- prev
- next
RGB LED Audio Visualizer Music Spectrum Display Audio Indicator DIY Kit SMD Soldering Practice Kits
$13.99$19.9930%
00d : 00h : 00m : 00s
Item ID: GY18152
Product Details
1.Introduction:
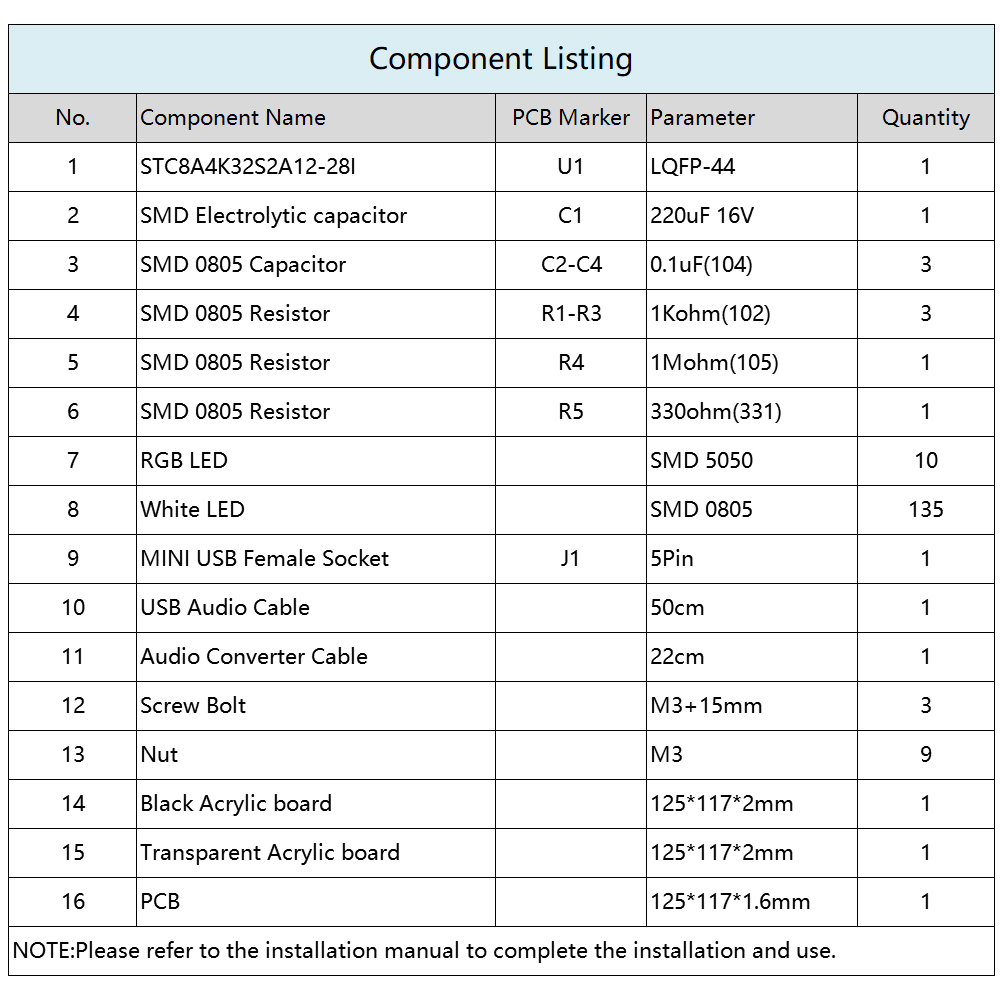
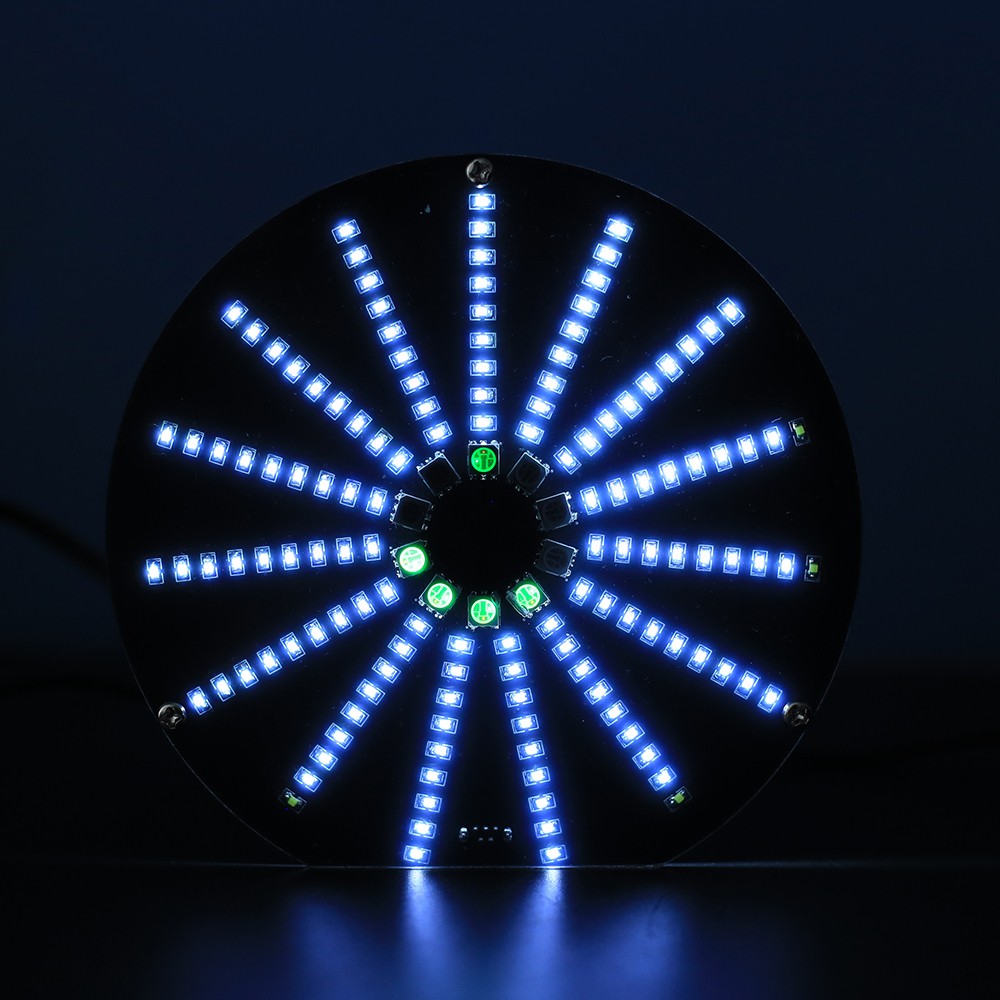
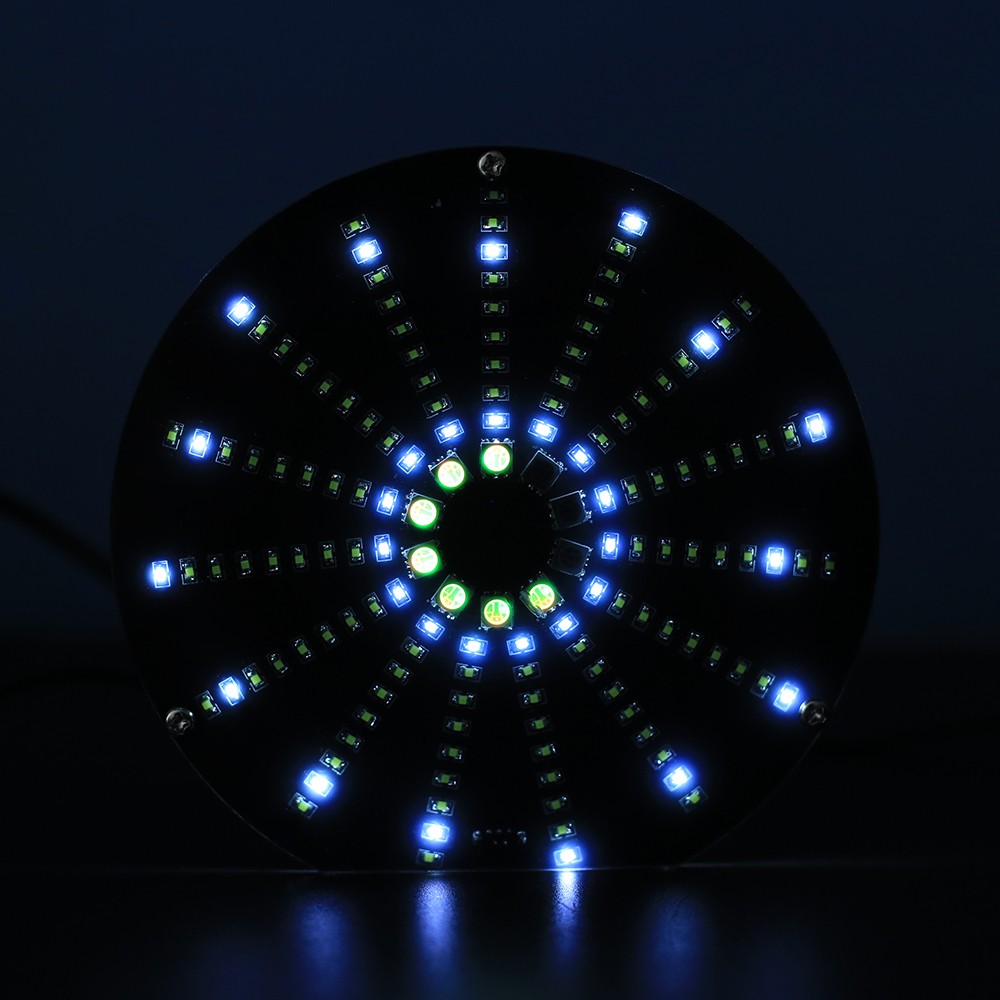
★This DIY kit is a unique circular music spectrum display composed of two kinds of LED.
★The inner circle is designed by 10pcs full-color 5050 RGB LED. It can produce different color variations according to different music beats.
★The outer circle is designed by white 0805 LED.
★The effect is outward spread by the center, and each vertical LED represents a different music frequency.
★The LED combination of the inner and outer circles will display different music beating effects in real time after the program analyzes the music when playing different music and bringing you a unique musical visual experience.
★Simple and creative and it is the best choice for electronics enthusiasts.
2.Feature:
1>.Inner/Outer unique circular shape of the music spectrum display
2>.10pcs 5050 RGB LED Flashing
3>.135pcs 0805 White Highlight LED
4>.4-kinds display mode for outer circle
5>.4-kinds different enhancements mode
6>.Automatic color change for inner circle
7>.Touch control
8>.Dual audio input design
9>.The automatic gain function can be adapted to different music devices
10>.Acrylic panel reduces light interference and preventing high brightness
3.Parameter:
1>.Work Voltage:DC 4.5V~5.5V
2>.Work Current:500mA
3>.Work Module:Automatic and Touch Button Control
4>.Work Temperature:-40℃~85℃
5>.Work Humidity:0%~95%RH
6>.Size(Installed):125*125*17mm
4.Set Method:
1>.Keep press touch button about 3second enter into the enhanced effect menu setting mode.
2>.Short press touch button to switch select 4-kinds enhancement effect.
3>.Keep press touch button about 3second again enter into the spectrum display effect menu setting mode.
4>.Short press touch button to switch select spectrum display effect:
4.1>.Normal display mode
4.2>.Floating point display mode
4.3>.Single point display mode
4.4>.Automatic switching display mode
5>.Keep press touch button about 3second again to save parameters and exit.
5.Installation Steps(Please be patient):
.png)