
- prev
- next
DC 5V Colorful Flashing LED Light DIY Kit Love Heart Shaped LED Lamp Electronic Soldering Practice Kit
| Quantity | 5+ | 10+ | 30+ |
| Price | $2.60 | $2.50 | $2.30 |
Product Details
Description:
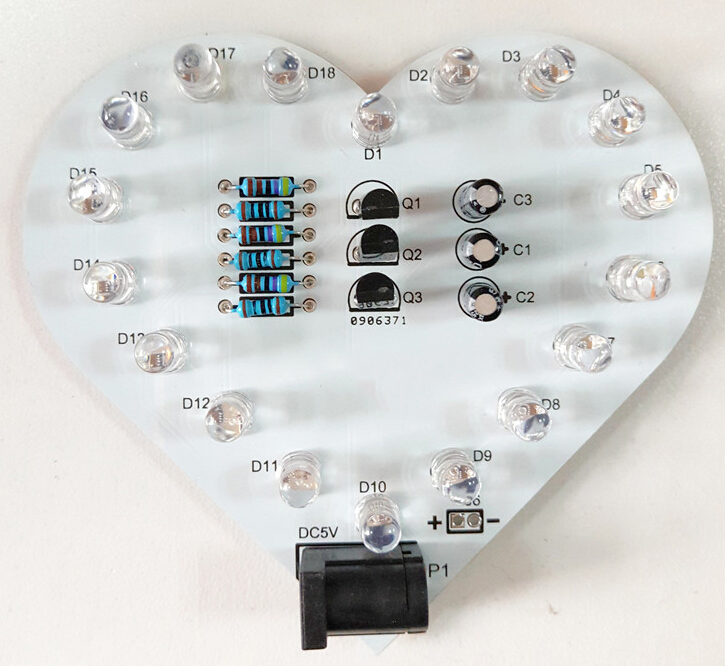
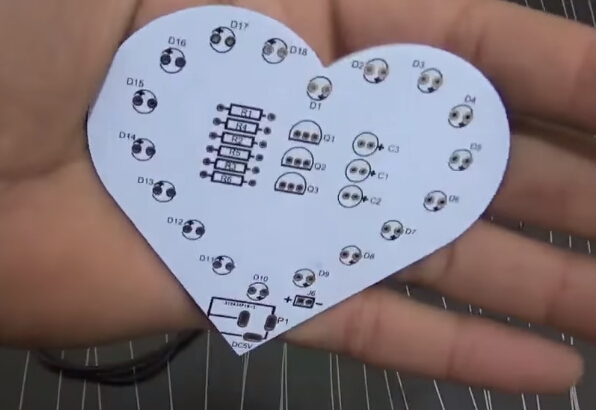
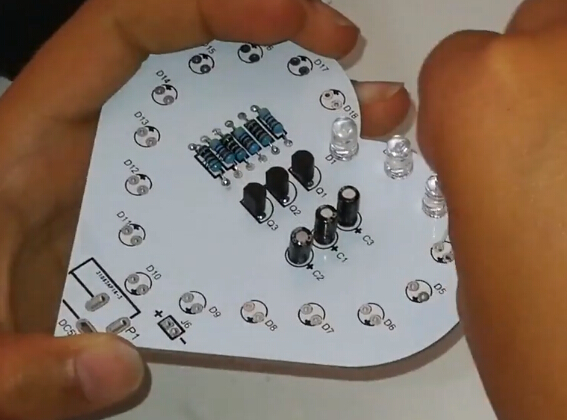
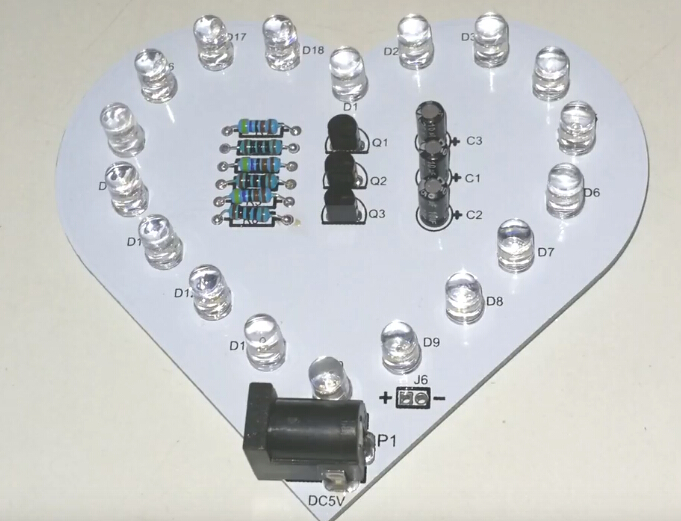
This is a DIY Heart Shape breathing colorful lamp with white pcb, which need to be soldered.
Parameters:
| No. | Parameters | Value |
| 1 | Name | Heart shape led |
| 2 | Operating voltage | DC 5V |
| 3 | Difficulty of welding machine | Easy |
| 4 | Circuit board size | 78*83mm |
| 5 | Light color | Colorful |
| 6 | Power supply mode | USB charger, Portable battery, Computer |
| 7 | Circuit board material | Double-faced 1.6mmRF-4 |
| 8 | Board color | White |
Component List:
| No. | Signs | Name | Specification | Quantity |
| 1 | R1, R2, R3 | Resistance | 4.7K | 3 |
| 2 | R4, R5, R6 | Resistance | 100R | 3 |
| 3 | Q1, Q2, Q3 | Audion | 9014 | 3 |
| 4 | LED1-LED18 | LED | 5mm colorful | 18 |
| 5 | DC base | 1 | ||
| 6 | C1, C2, C3 | Electrolytic capacitor | 3 | |
| 7 | PCB board | 1 |
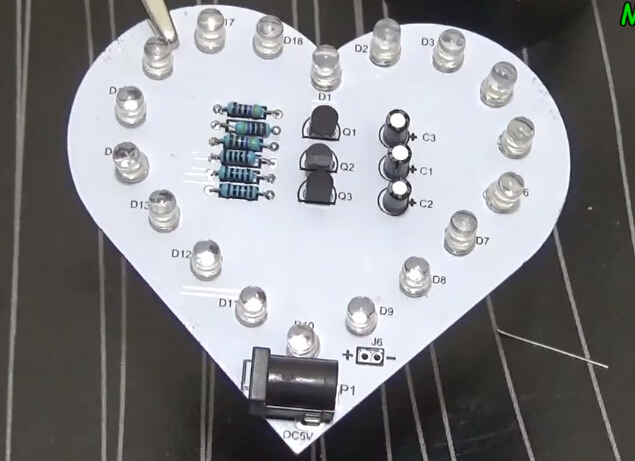
Install tools:
1>. Electric iron one (power is best at 40W)
2>. Solder wire reel (diameter is best about 0.8mm)
3>. A number of solder paste or rosin
4>. Scissors pliers
5>. Component box (store the small components)
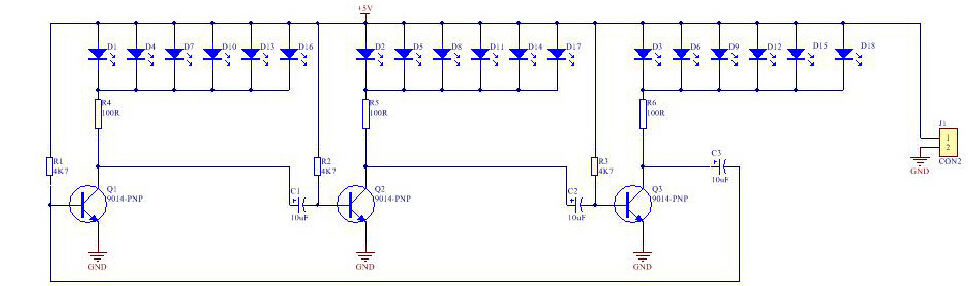
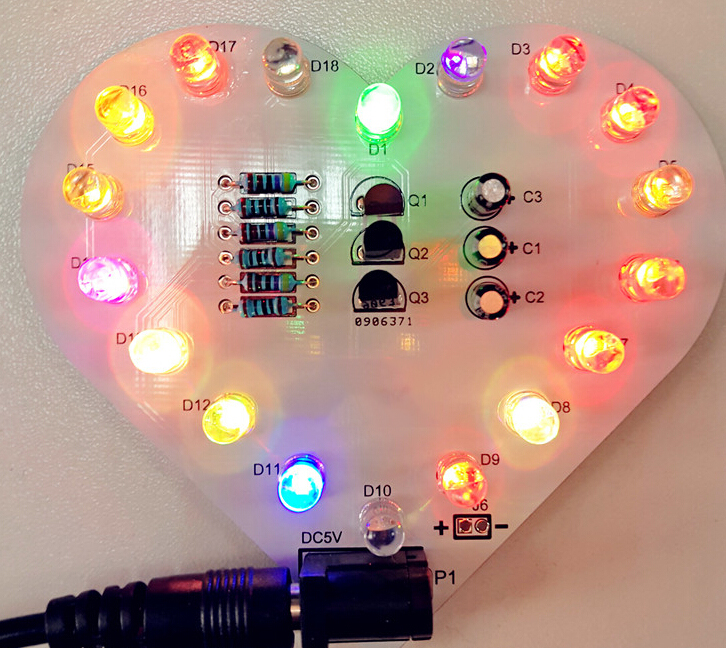
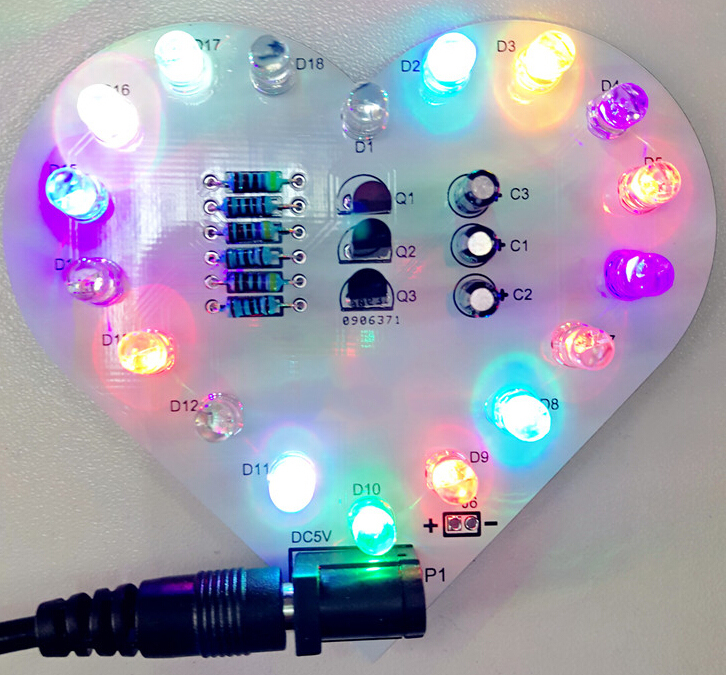
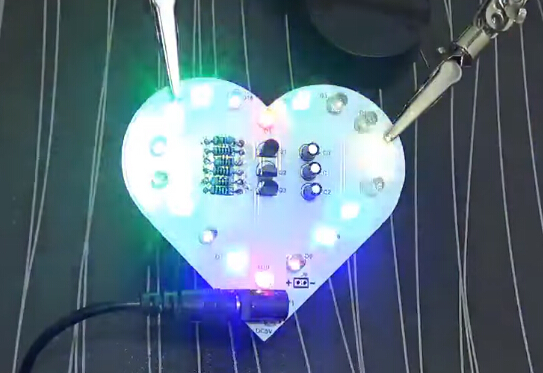
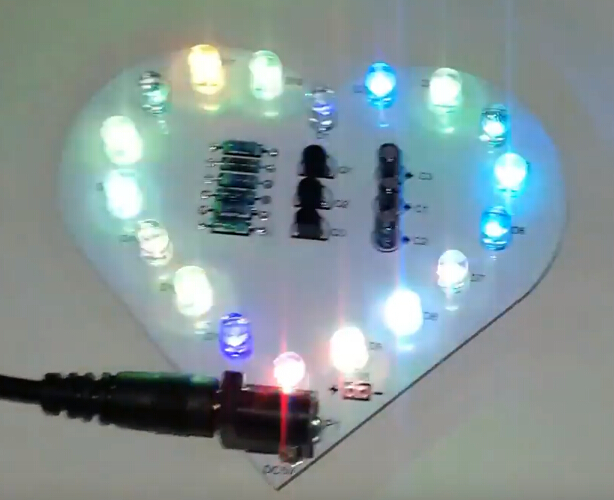
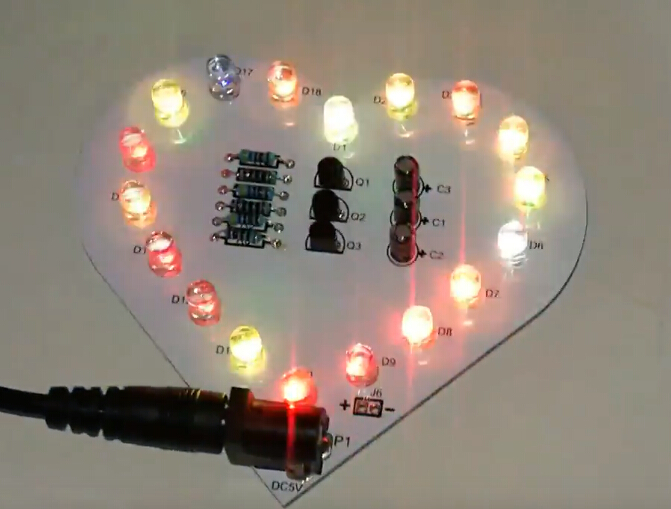
1>. The kit contains 18 colorful LED, divided into three groups, arranged into a heart-shaped pattern. Driven by a triode oscillator circuit, the red heart pattern constantly rotates and shines in clockwise direction, especially at night.
2>. From the schematic diagram, it can be seen that when the 3-5V power supply is connected, 18 LED are divided into 3 groups.
The 3 audions will would be a race to be conducted. But there are differences in components, only one audion is conducted first.
3>. Suppose that Q1 is first conducted, then the LED1 group lights up. As the Q1 is switched on, its collector voltage drops, so that the left end of the capacitor C2 drops, close to 0V. Since the voltage at both ends of the capacitor cannot change,the base of the Q2 is also connected to the approximate 0V, Q2 cutoff. So the group of LED2, which is attached to its collector, goes out.
4>. At this point, the high voltage of the Q2 increases the Q3 collector voltage through the capacitor C3, and the Q3 will also be switched on quickly.
The LED3 group is lighted up.
5>. Therefore, in the period of time, the collector of Q1 and Q3 are low level, the two groups of LED1 and LED3 are lighted, and the LED2 group is extinguished.
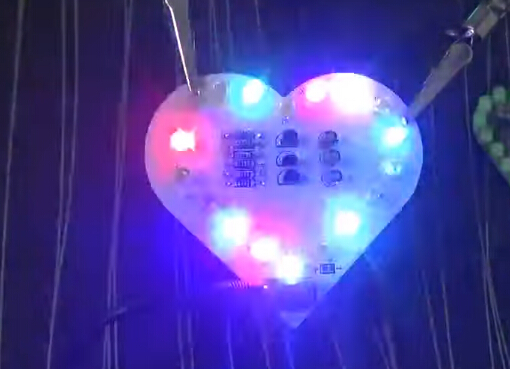
However, as the power supply charges the C2 through the resistor R2, the base voltage of the Q2 increases gradually.
When LED2 exceeds 0.7V, the Q2 changes from the cut-off state to the turn-on state, and the collector voltage drops, and the group is lightened.
At the same time, the collector drop voltage of Q2 reduces the base voltage of Q3 through C3. Q3 by the change as the cutoff, the collector voltage increases, the group of LED3 goes out.
6>. Next, the circuit follows the process described above, and the three group of 18 LED turns in turns. At the same time, two groups will be lit up.
These LED are arranged in a heart shape pattern, constantly flashing and flashing, to achieve the effect of flow display.
Finished Product Picture:
I. Tested by ICStation's Outstanding Partner Mr Engineer:
Learn More Details in the Video:
(The language in the video is Urdu)
II. Tested by ICStation's Outstanding Partner DrakerDG:

Learn More Details in the Video:
(The language in the video is Spanish)
Customer Reviews (2)
-
By MARK CLARK2021-08-26 00:32:45
Nice and very easy Kit. I put the LED's on the revised (only white) side and did not use the DC barrel jack I installed a JST 2.0 PH 2Pin Connector Plug and used a Li-ion 250mAh battery with its own TP4056, which works great. I can also then use a power bank with an adaptor. -
By Shahmin Aizat2019-11-26 12:45:06
Why i cannot buy this item


