- prev
- next
DIY Kit Game Toy Machine Red LED Display Module Creative Electronics Experiment Kit for Snake/Plane/Racing/Fruit Slot
$11.19$15.9930%
00d : 00h : 00m : 00s
Item ID: GY17674
Product Details
1.Introduction:
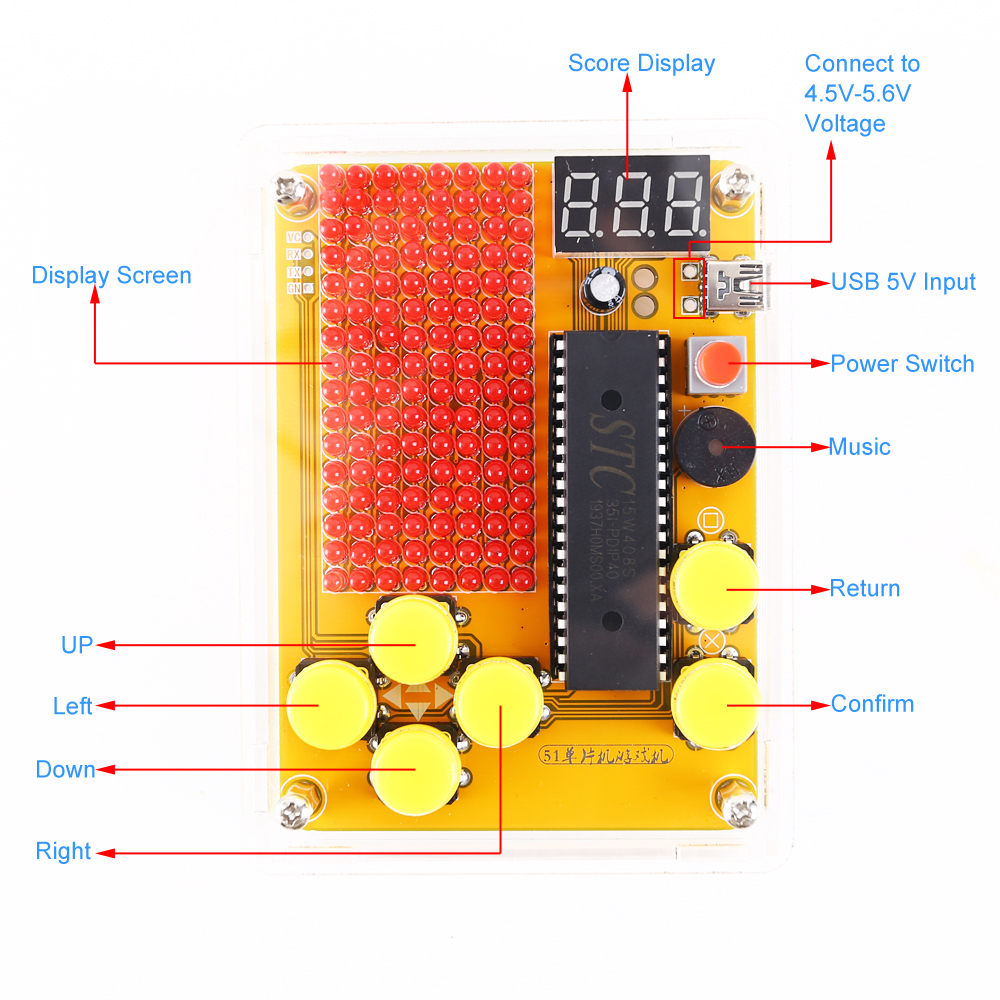
It is a DIY game console that users can install it by themselves to play games. It contains 5 games: Tetris/Snake/Plane/Racing/Fruit Slot. Users can not only learn circuits and practice soldering skills, but also enjoy the fun of the game.
2.Feature:
1>.Built-in 5 classic games
2>.Built-in game background music
3>.Adjustable display backlight
4>.Real-time game scores
5>.Power-off memory function
3.Parameter:
1>.Work Voltage:DC 4.5V~5.5V
2>.Work Current:100mA
3>.Work Temperature:-40℃~85℃
4>.Work Humidity:0%~95%RH
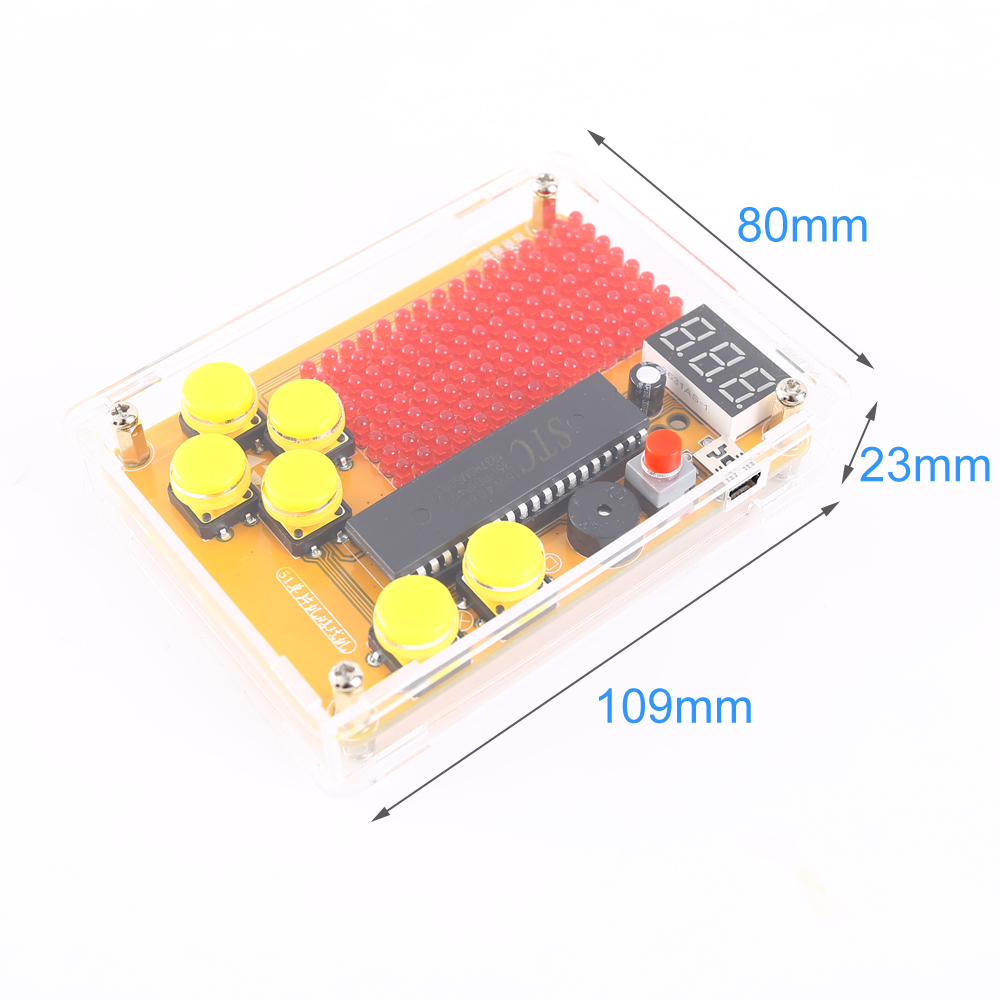
5>.Size(Installed):109*80*23mm
4.Installation Tips:
1>.User needs to prepare the welding tool at first.
2>.Please be patient until the installation is complete.
3>.The package is DIY kit.It need finish install by user.
4>.The soldering iron can't touch the components for a long time(1.0 second), otherwise it will damage the components.
5>.Pay attention to the positive and negative of the components.
6>.Strictly prohibit short circuit.
7>.Users can complete installation by PCB silk screen and component listing.
8>.User must install the LED according to the specified rules.Otherwise some LED will not light.
9>.Install complex components preferentially.
10>.Make sure all components are in right direction and right place.
11>.It is strongly recommended to read the installation manual before starting installation.
5.Installation Steps (PDF can be download below):
.png)
Step 1: Install 128pcs 3mm Red LED.Pay attention to the positive and negative of the components.The longer pin is positive pin.
Step 2: Install 1pcs Micro USB Female Socket.
Step 3: Install 1pcs 5V 12mm Passive Buzzer.Pay attention to the positive and negative pole and there is a mark on buzzer.
Step 4: Install 1pcs DIP-40 IC Socket.Pay attention to the installation direction.
Step 5: Install 6pcs 12*12mm Black Button.
Step 6: Install 1pcs 3Bit Red Digital Tube.
Step 7: Install 1pcs 220uF 16V Electrolytic Capacitor.Pay attention to the positive and negative of the components.The longer pin is positive pin.
Step 8: Install 1pcs Self-locking Switch.Pay attention to the installation direction.
Step 9 Install 1pcs DIP-40 STC15W408S Controller on IC Socket.Pay attention to the installation direction.
Step 10: Install 1pcs Red and 6pcs Yellow Button Cap.
Step 11: Install copper posts.
Step 12: Remove the protective film from the acrylic surface.
Step 13: Install the acrylic case.
Step 14: Input work voltage from micro USB and test and Application.
.JPG)