• DIY Kit RGB Flashing LED Circuit Colorful 3D Christmas Trees Kit MP3 Music Box with Shell for Christmas Xmas Gifts
  • DIY Kit RGB Flashing LED Circuit Colorful 3D Christmas Trees Kit MP3 Music Box with Shell for Christmas Xmas Gifts
  • DIY Kit RGB Flashing LED Circuit Colorful 3D Christmas Trees Kit MP3 Music Box with Shell for Christmas Xmas Gifts
  • DIY Kit RGB Flashing LED Circuit Colorful 3D Christmas Trees Kit MP3 Music Box with Shell for Christmas Xmas Gifts
  • DIY Kit RGB Flashing LED Circuit Colorful 3D Christmas Trees Kit MP3 Music Box with Shell for Christmas Xmas Gifts
  • DIY Kit RGB Flashing LED Circuit Colorful 3D Christmas Trees Kit MP3 Music Box with Shell for Christmas Xmas Gifts
  • DIY Kit RGB Flashing LED Circuit Colorful 3D Christmas Trees Kit MP3 Music Box with Shell for Christmas Xmas Gifts

DIY Kit RGB Flashing LED Circuit Colorful 3D Christmas Trees Kit MP3 Music Box with Shell for Christmas Xmas Gifts

$20.99
$29.9930%
00d : 00h : 00m : 00s
Item ID: 12368

Product Details

Description:
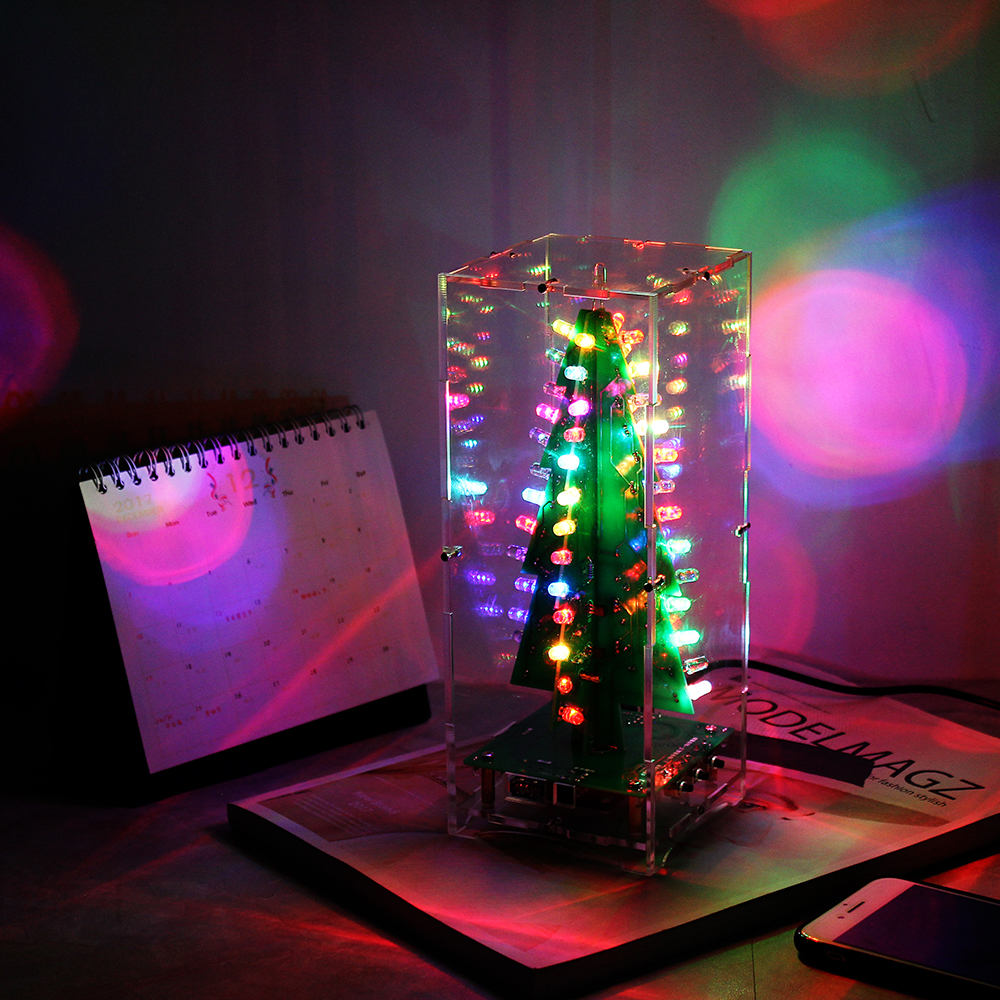
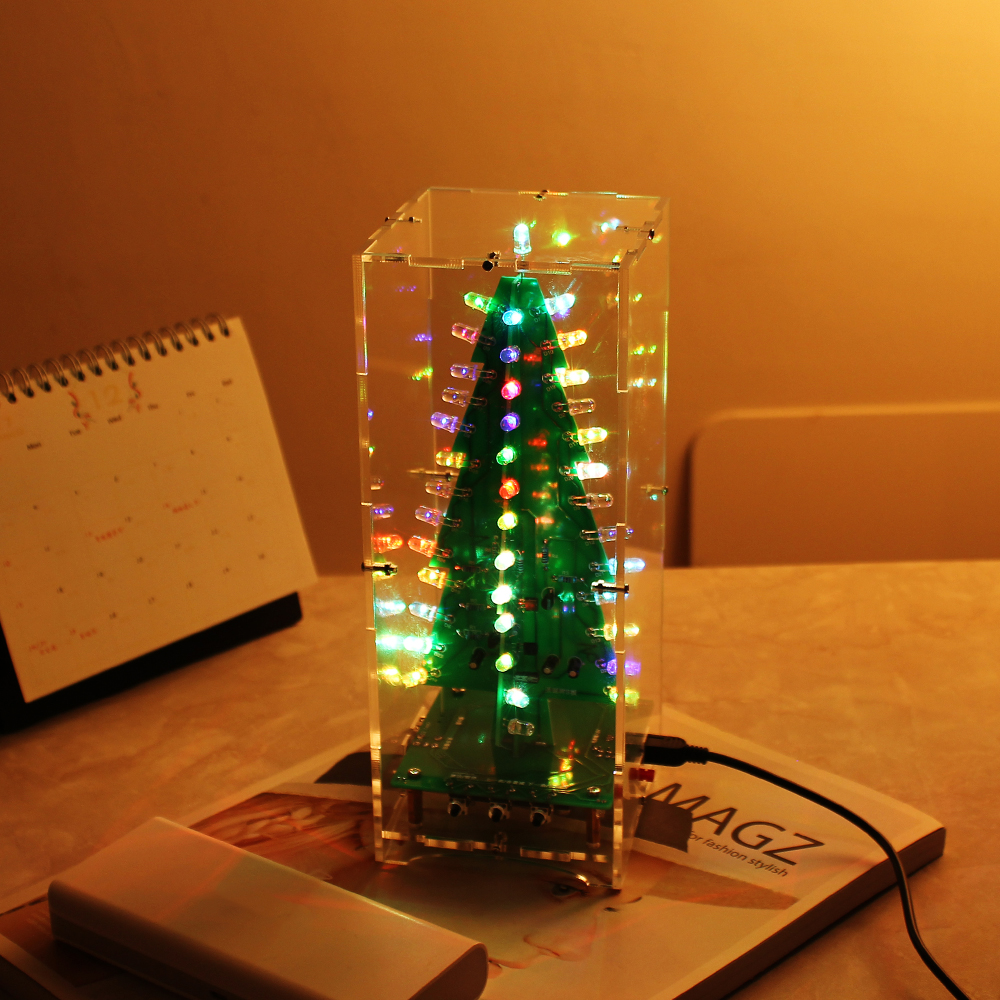
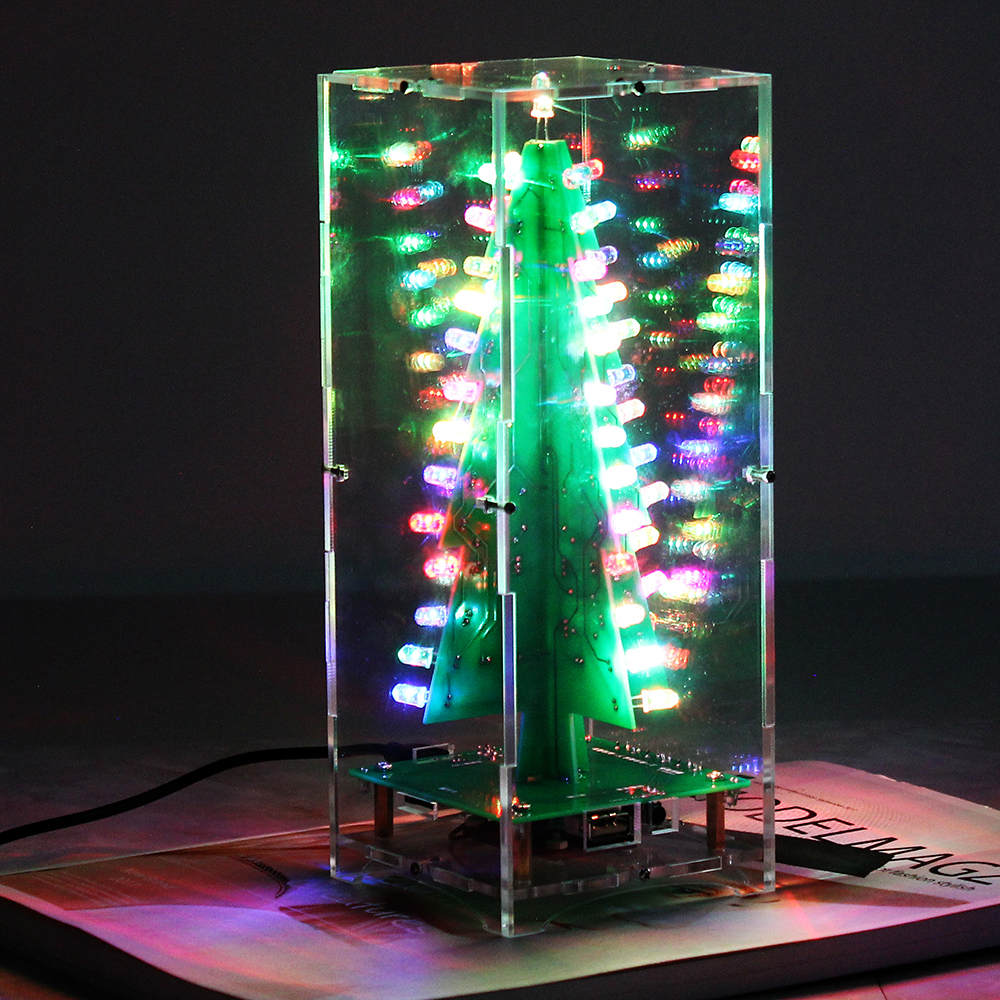
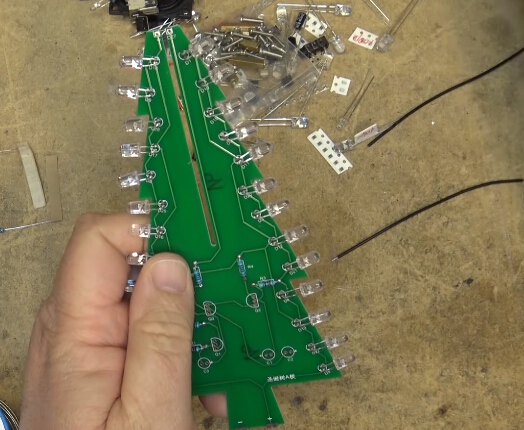
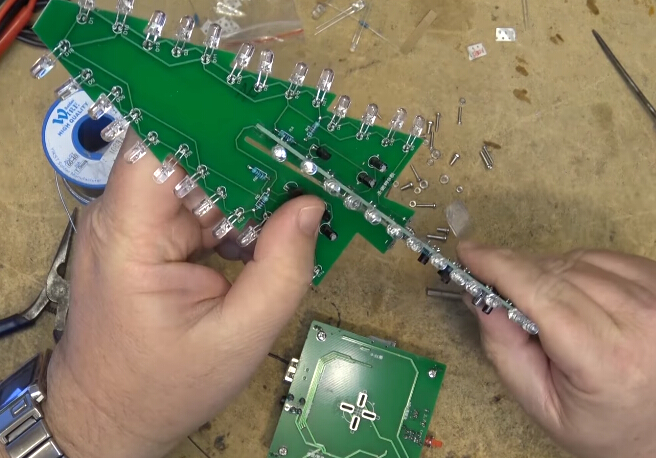
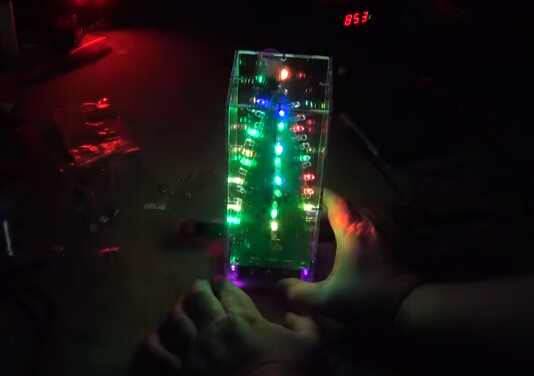
The Christmas tree music DIY suite consists of three circuit boards and components. You need to weld by yourself. The 53pcs 5mm LEDs flicker following the rhythm of the music. It presents a three-dimensional effect of the Christmas tree. The night viewing is better.

Features:
1>. Automatically flashing after power on;
2>. Support MP3 format music;
3>. Support TF card;
4>. Support U disk;
5>. Built-in 2W amplifier function;
6>. Comes with 4ohm 3W speaker;
7>. Support music output;
8>. Support volume adjustment;
9>. Support voice control: Previous,Next,Start/Pause.
 
Parameters:
1> Operating voltage: DC 5V
2> Power Type: MINI USB
3> Installation Size: 8888218mm
4> Circuit board material: double sided 1.6mm RF-4 PCB.

Installation Attention:
It consists of 53 identical white transparent LED lamps. After the lighting, it will change the regular color of seven colors. When in the test, you should stay a few seconds after lighting to see the transformation of the lantern. Welding position is not distinguished, welding at random position, long foot as positive pole.

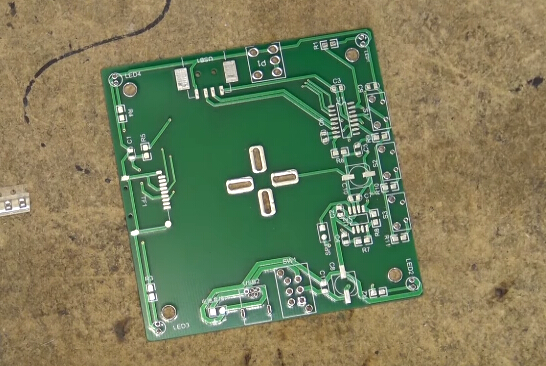
Schematic Diagram(PCB-B):


Working Principle:

From the schematic diagram, when connected with 3-5V, 18pcs LEDs are divided into 3 groups. When the power is on, one of the 3 transistors will be the first one to be connected.
 
If Q1 is the first connected, the LED1 group is lit. Due to the Q1 conduction, capacitance C2 close to 0V and Q2 to 0V too; Group LED2 goes out. At that time high voltage flowing from Q2 to C3 increases the Q3 voltage, thus connecting Q3 in this circuits; Group LED3 is lit. In this case, Q1 and Q3 collector are low level, group LED1 and LED3 is lit, LED2 goes out.
 
But when power flows through R2 and charges the C2, the base voltage of Q2 gradually increases; when Volt is over 0.7V, Q2 is connected, and group LED2 is lit. At the same time, base voltage of Q3 decreases, Q3 is cut off, group LED3 goes out. In all, the circuit repeats the process described above, and the three group Leds will be lit by turns, 2 of which will be lit at the same time to reach the waterfall light effect.

Component List:

NO. Component Name PCB Marker Parameter QTY
1 SMD Capacitor C1-C3,C5-C7 luf(105) 7
2 SMD Capacitor C4,C11 104(0.1uf) 2
3 SMD Capacitor C9 100PF 2
4 SMD Resistor R1-R4 1K(102) 5
5 SMD Resistor R5 4.7R(4R7) 2
6 SMD Resistor R6 0R(000) 2
7 SMD Resistor R7 20K(223) 2
8 SMD Resistor R8 47K(473) 2
9 SMD Resistor R9 22K(223) 2
10 SMD Resistor R10 33K(333) 2
11 SMD Resistor R11 51K(513) 2
12 TF Card Socket TF1   1
13 IC U1 SOP-16 1
14 8002B U2 SOP-8 1
15 Mini USB Female Socket USB2 Min USB 1
16 USB Female Socket USB1   1
17 Electrolytic Capacitor C8, C10 220UF/16V 2
18 Button S1, S2 ,S3   3
19 LED LED1, LED2, LED3, LED4 3mm Pink LED 5
20 Audio Socket P1   1
21 Speaker Pin SP1   1
22 Speaker     1
23 Self-locking switch SW1   1
24 Metal Film Resistor A:R2,R4,R6 B:R2,R4,R6 100R 7
25 Metal Film Resistor A:R1,R3,R5 B:R1,R3,R5 4.7K 7
26 Electrolytic Capacitor A:C1,C2,C3 B:C1,C2,C3 47uf/16v 6
27 S9014 A:Q1,Q2,Q3 B:Q1,Q2,Q3   6
28 LED A:D1-D26   B:D1-D26   58
29 PCB     3

NOTE: Users can complete the installation by PCB silk screen and component listing.


Basic Instruction:

1> MINI USB: Power interface(It is recommended to use USB power supply);
2> Power interface 2: Another way of power supply,such as battery box(Not recommended);
3> Self-locking Switch: Power Switch;
4> Speaker: Connect to speaker.Note the direction;
5> Standard USB: U disk interface;
6> TF Socket: TF card interface;
7> Audio Output: Output audio from U disk or TF card.It can connect to Other speakers;
8> Music Indicator: LED will flash when playing music;
9> Start/Pause: Start or pause playing music;
10> Prev/Volume-: Short press to play previous music;Long press to decrease the volume;
11>. Next/Volume+: Short press to play next music;Long press to increase the volume.

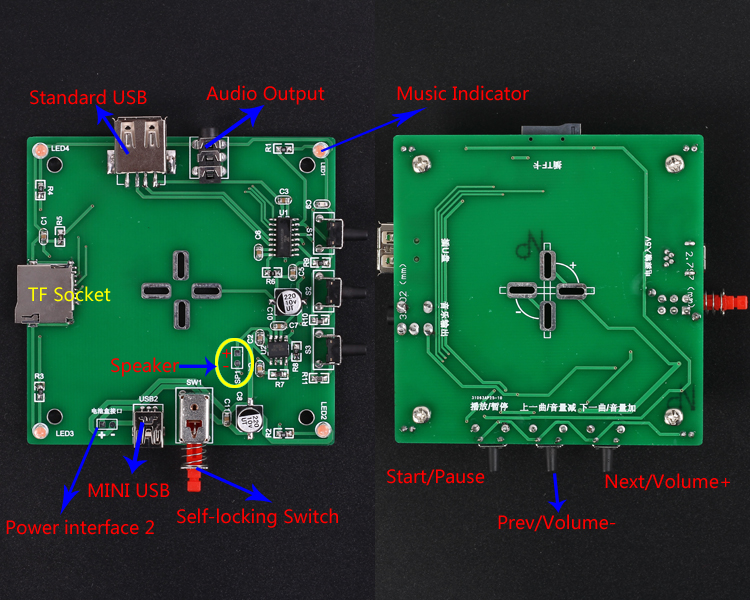
Operating Instruction:
1>. Power on and switch on power.LED will automatically flash.
2>. Insert U disk or TF card within MP3 music and wait for a few seconds.
3>. Press Start button to play music.
4>. Switch music or adjust volume.
5>. Press Pause button to stop music.
6>. Switch OFF power;
7>. Unplug U disk or TF Card.

Please Clik Here to download PDF installation manual:
 

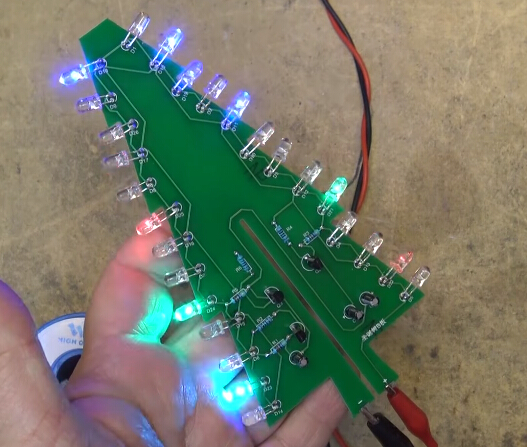
Finished Product Picture:

Tested by ICStation's Outstanding Partner 12voltvids:

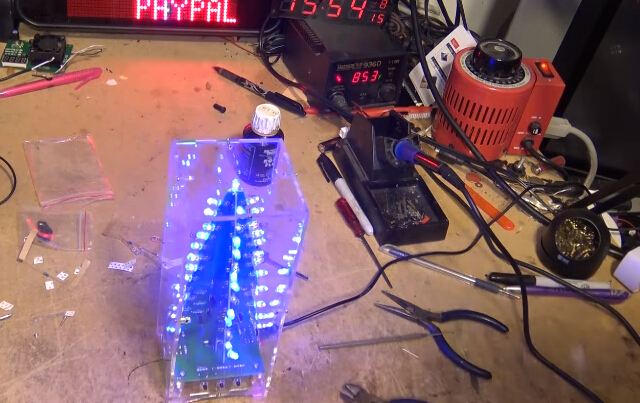
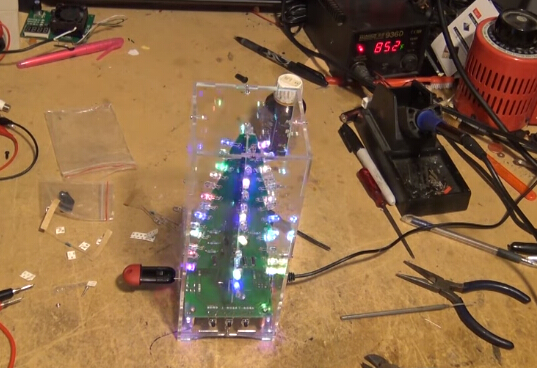
Learn More Details in the Video:

Customer Reviews (0)