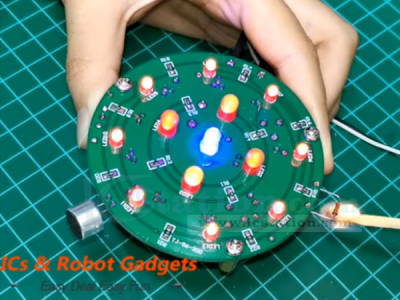
This circuit simulates a real candle, lit with fire, and blown out with a mouth. Light up and play the "Happy Birthday to You" song, stop playing the music when it blows out.
2.Features:
1>.Simulating candle
2>.More realistically imitating candles
3>.DIY custom installation
4>.Learning circuit
5>.Practice welding
3.Parameters:
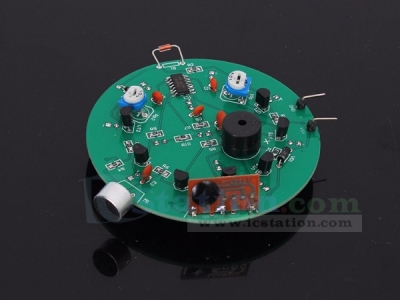
1>.Product Name:DIY Kit Analog Electronic Candle Light
2>.Work Voltage:DC 5V
3>.Work Temperature:-40℃~85℃
4>.Work Humidity:0%~95%RH
5>.Size(Installed):70*70*11mm
4.Circuit Principle:
▲This circuit uses a D flip-flop to form an R-S flip-flop.
▲After the power is turned on, the differential circuit composed of R7 and C4 generates a high-level differential pulse, then outputs it to the RST terminal of IC1, forcing the circuit to reset. The Q terminal outputs a low level, and outputs to the base of the triode VT5 and VT6. VT5. VT6 is cut off, the LED is not lit, and the buzzer does not ring.
▲When the thermistor Rt is burned with a lighter (the burning time is too long and the thermistor is easily burned out), the resistance of R1 suddenly becomes small, showing a low resistance state.
▲The triode VT1/VT2 is turned on successively (Rp1/Rp2 can be separately adjusted for VT1/VT2 on-time), the high-level pulse generated is output to the SET terminal of IC1, the Q-end is turned to a high level, and the output is applied to the base of the transistor VT5/VT6, and the triode VT5/VT6 is turned on.
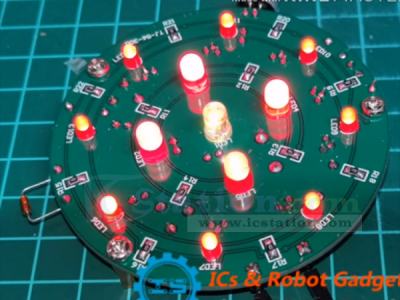
▲LED turn ON, the buzzer plays the "Happy Birthday to You" piece. This process is equivalent to lighting the candle with a match. At this time, even if the lighter leaves the thermistor Rt, the state of the circuit does not change.
▲When the wind blows toward the microphone M1, the audio signal output by the microphone M1 is output to the base of the VT3 through C3, and the VT3 is turned on.
▲Because the resistance of R5 is relatively large, the collector potential of VT3 drops very low, the base potential of PNP transistor VT4 is very low, VT4 is turned on, and the high level pulse is output to the RST terminal of the flip-flop.
▲The trigger is reset, the Q terminal changes from high level to low level, VT5/VT6 is cut off, the light emitting diode is off, and the buzzer stops playing the "Happy Birthday to You" music, realizing the simulation effect of "wind blowing out".
5.Using Steps:
1>.Complete the correct installation according to ‘Installation Steps’.
2>.Connect 5V power supply.
3>.Use a lighter to burn the thermal sensor about 2second(Can not for more time.Otherwise it will damage the sensor)
4>.LED will turn ON and Buzzer playing ‘happy birthday to you’.The buzzer can only simulate playback, the quality of the voice is not very good, please note.
5>.Blowing towards the microphone, the LED will go out and the buzzer will stop playing.
6.Note:
1>.User needs to prepare the welding tool first.
2>.Please be patient until the installation is complete.
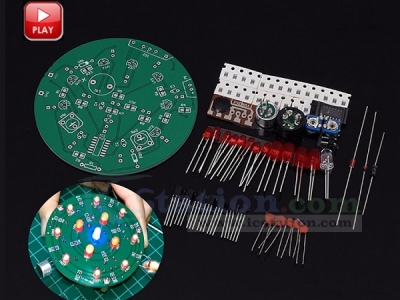
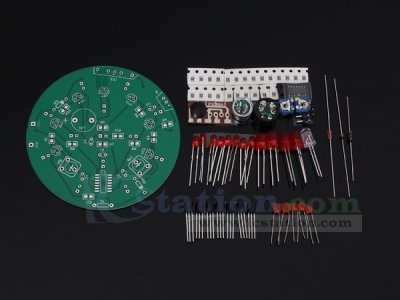
3>.The package is DIY kit, not finished products.
4>.The soldering iron can't touch the components for a long time(1.0 second), otherwise it will damage the components.
5>.Pay attention to the positive and negative of the components.
6>.Strictly prohibit short circuit.
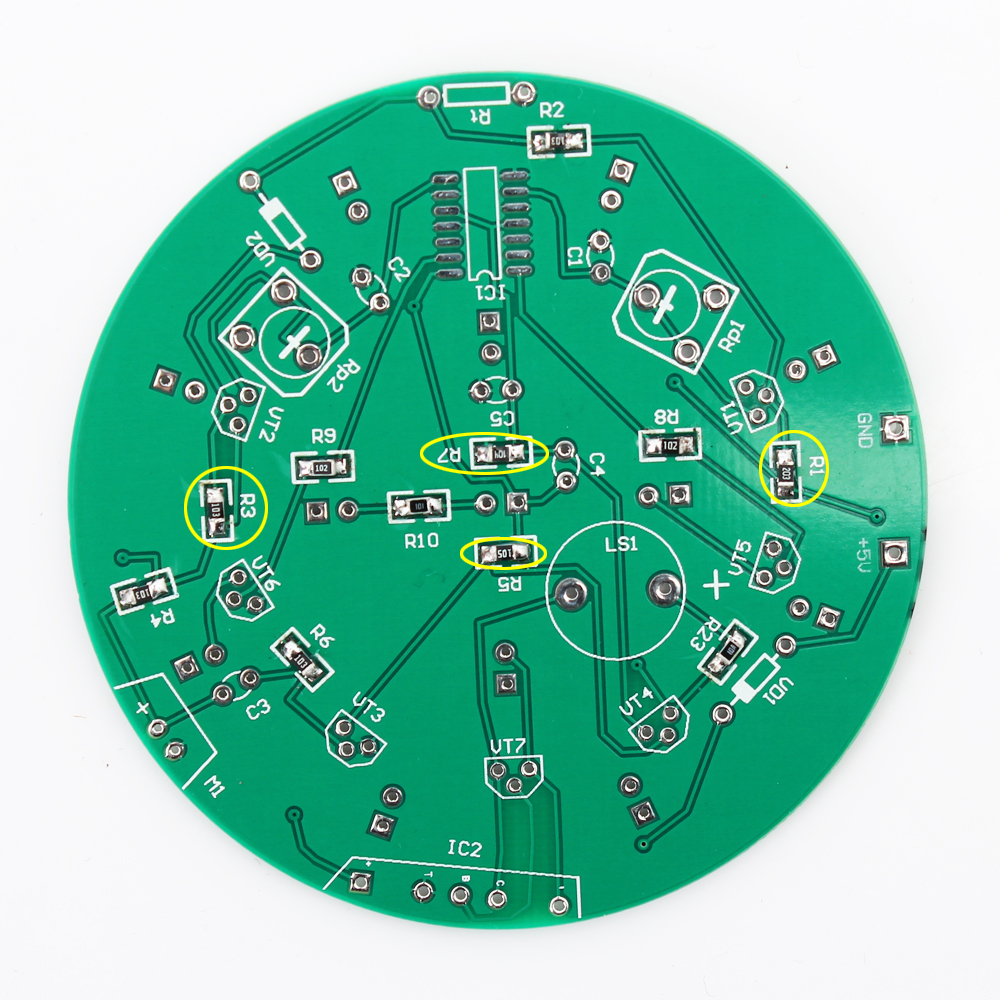
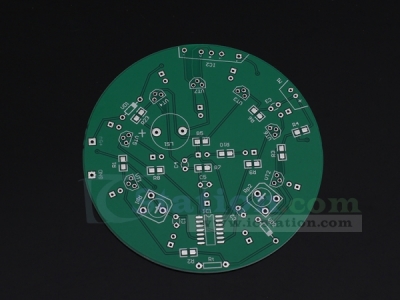
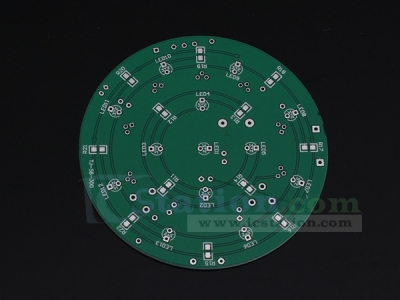
7>.Users can complete installation by PCB silk screen and component lists.
8>.The buzzer can only simulate playback, the quality of the voice is not very good, please note.
9>.It is strongly recommended to read the installation manual before starting installation.
7.Installation Steps
Tips:
▲1.Install SMD components at first.
▲2.Install complex components preferentially.
▲3.Pay attention to the installation direction of components.
▲4.Make sure the soldering iron does not touch the components for a long time.Otherwise it is easy to damage the components.
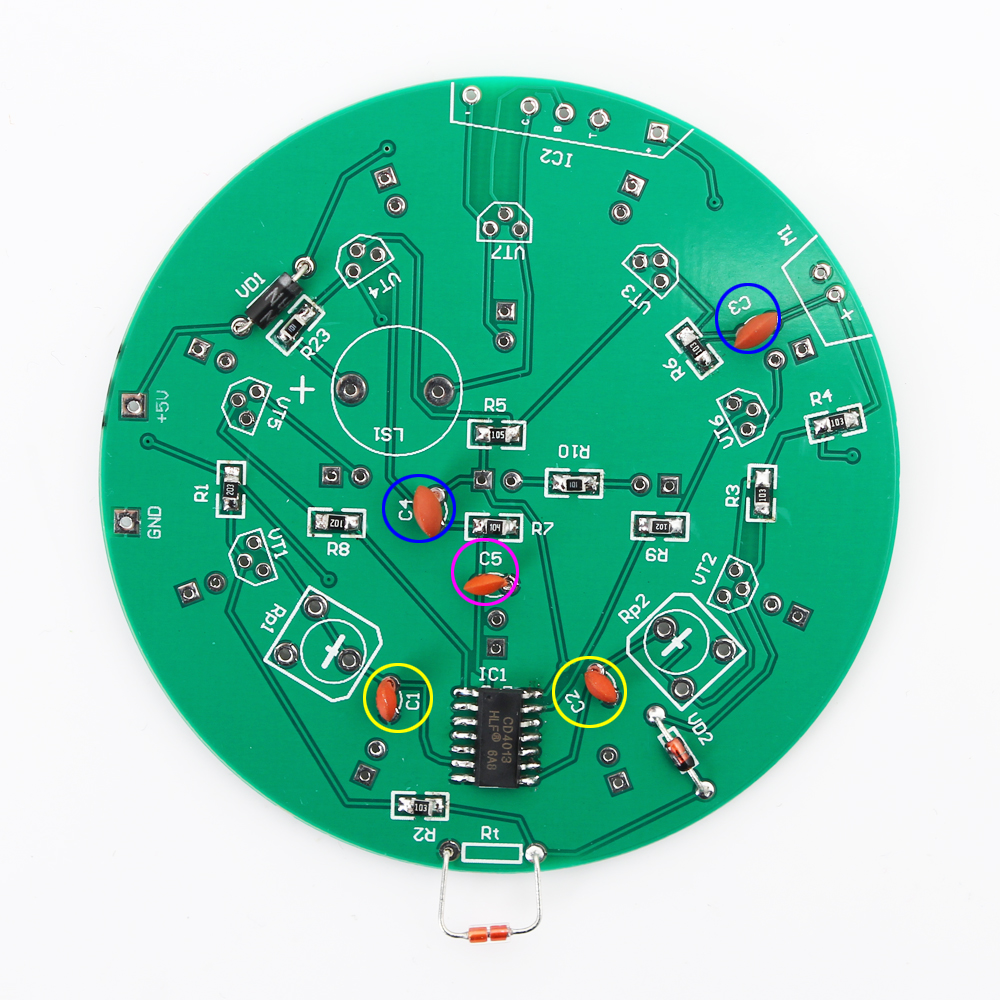
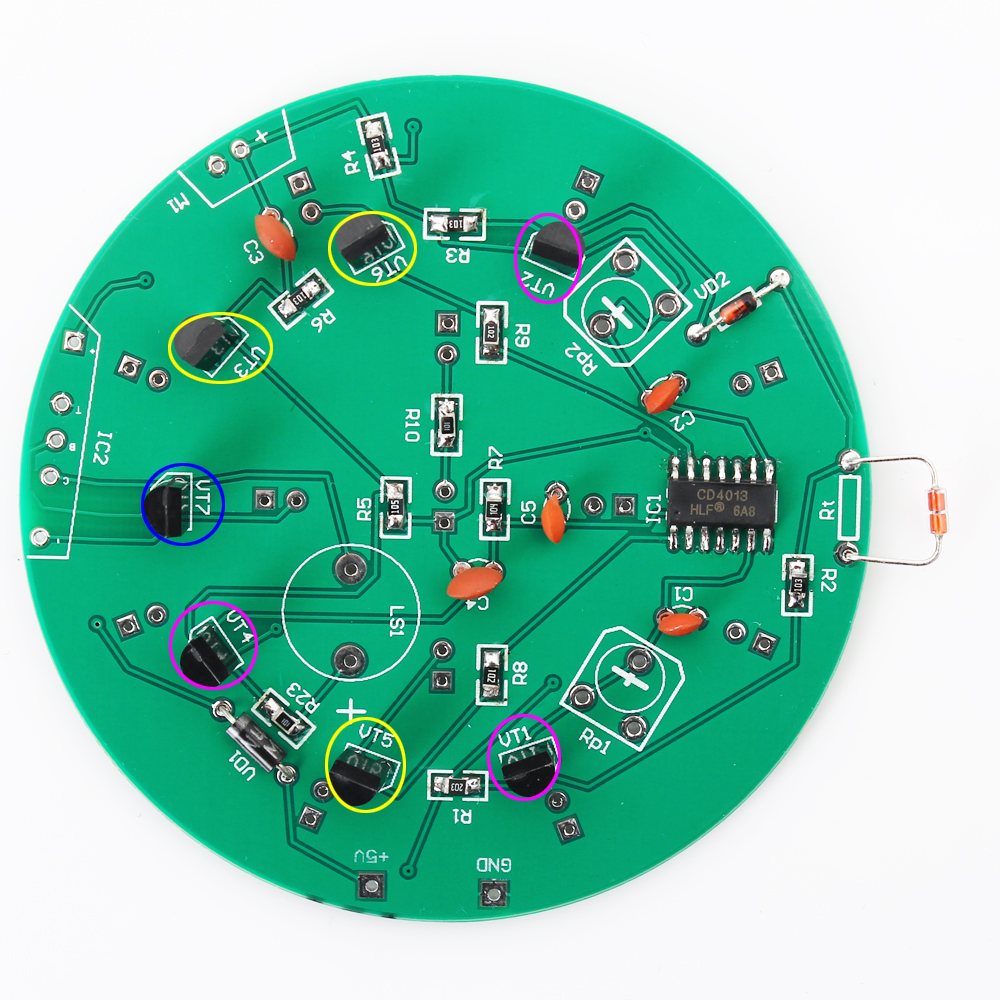
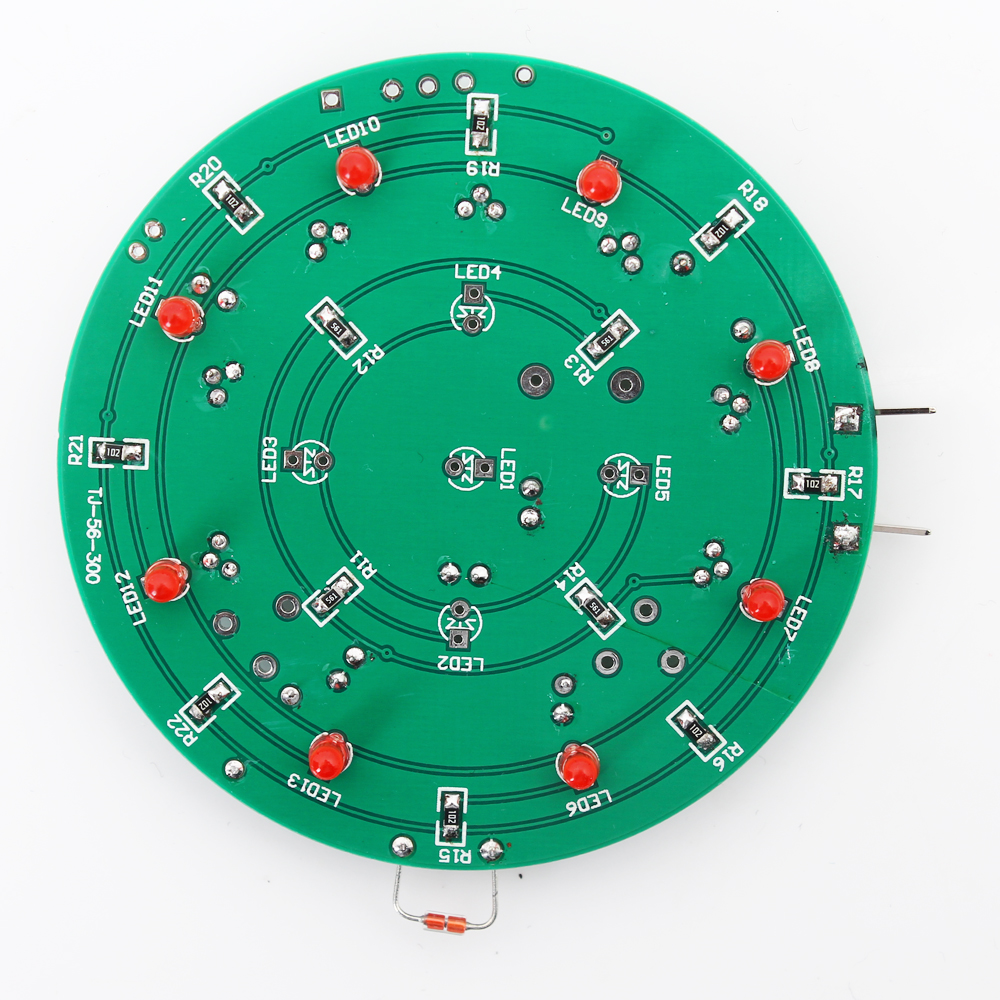
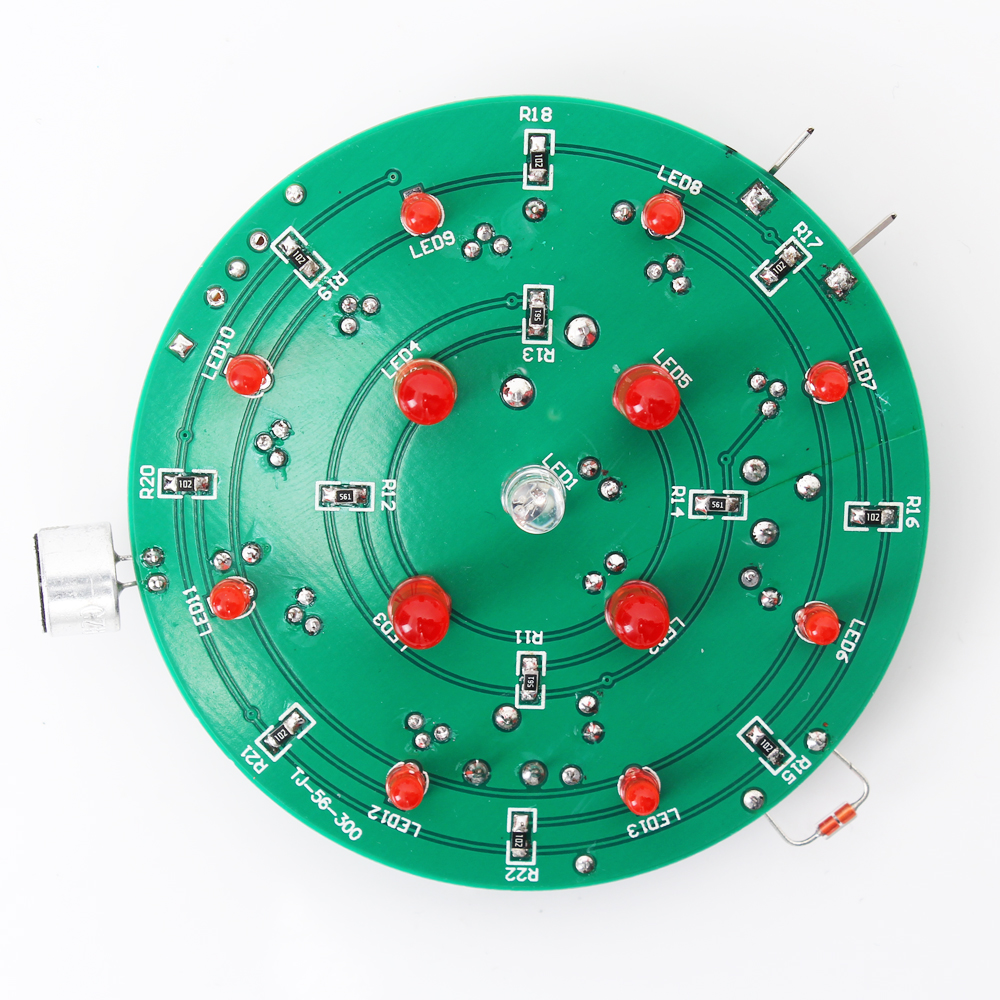
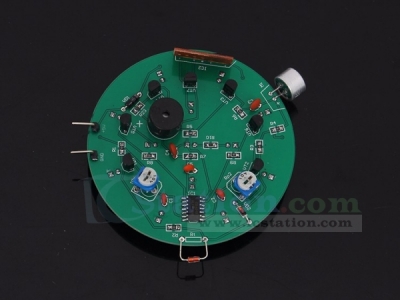
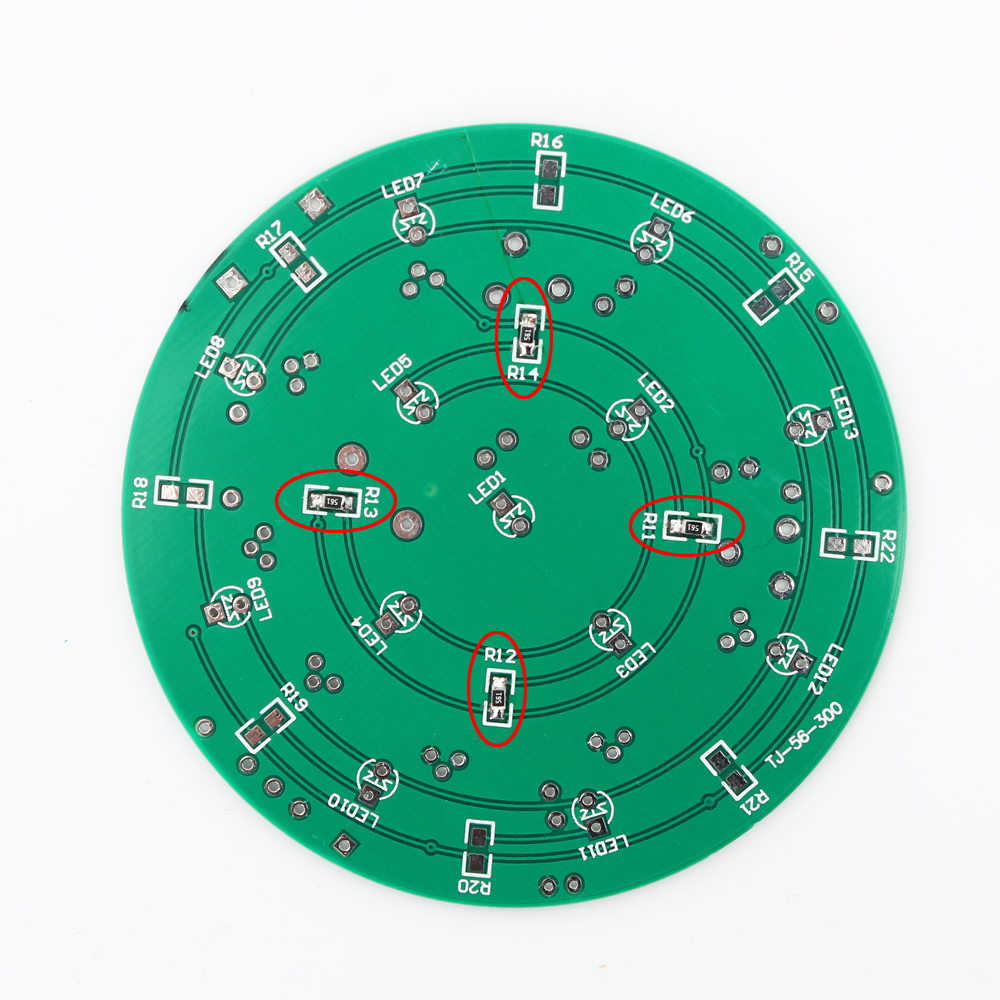
Step 1:Install 4pcs 560ohm 0805 SMD resistor at R11-R14.
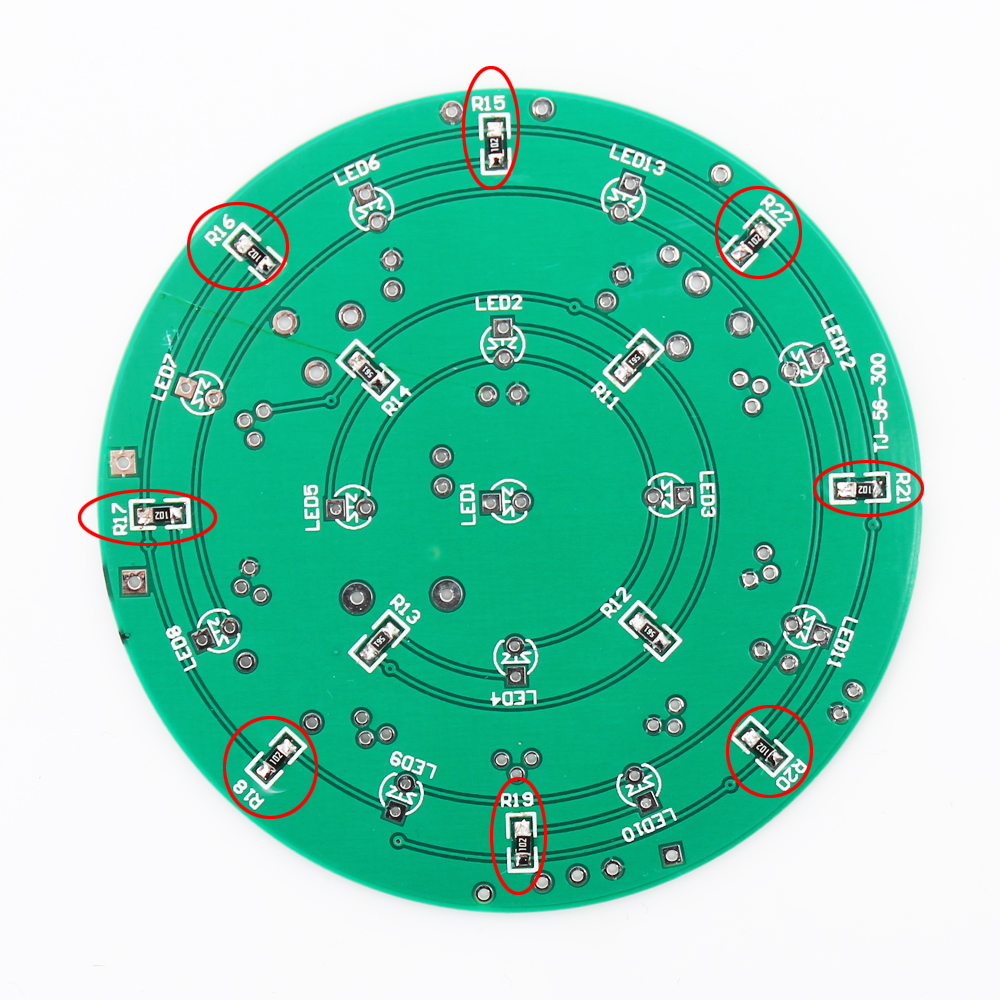
Step 2:Install 8pcs 1Kohm 0805 SMD resistor at R15-R22.
Step 3:Install 2pcs 1Kohm 0805 SMD resistor at R8-R9.3pcs 10Kohm at R2,R4,R6. 2pcs 100ohm at R10,R23.
Step 4:Install 1pcs 360ohm 0805 SMD resist or at R3.1pcs 20Kohm at R1. 1pcs 1Mohm at R5.1pcs 100Kohm at R7.
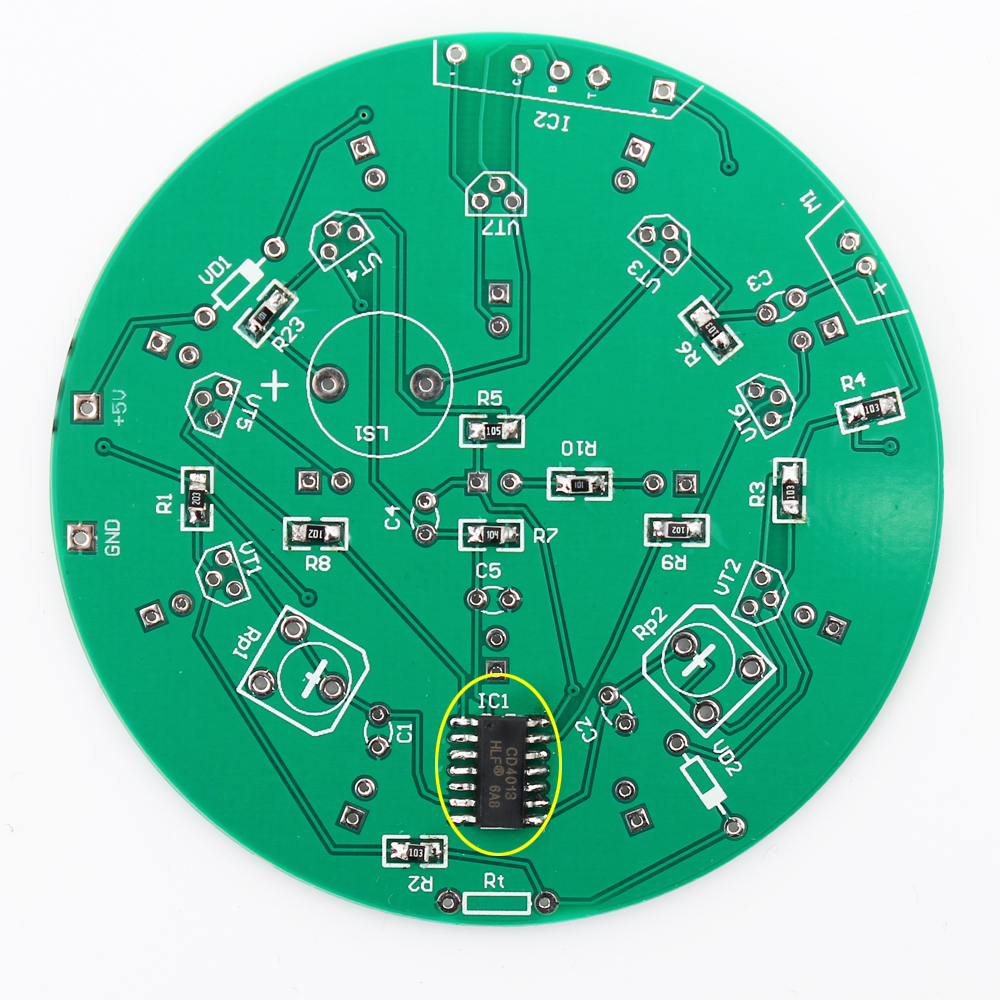
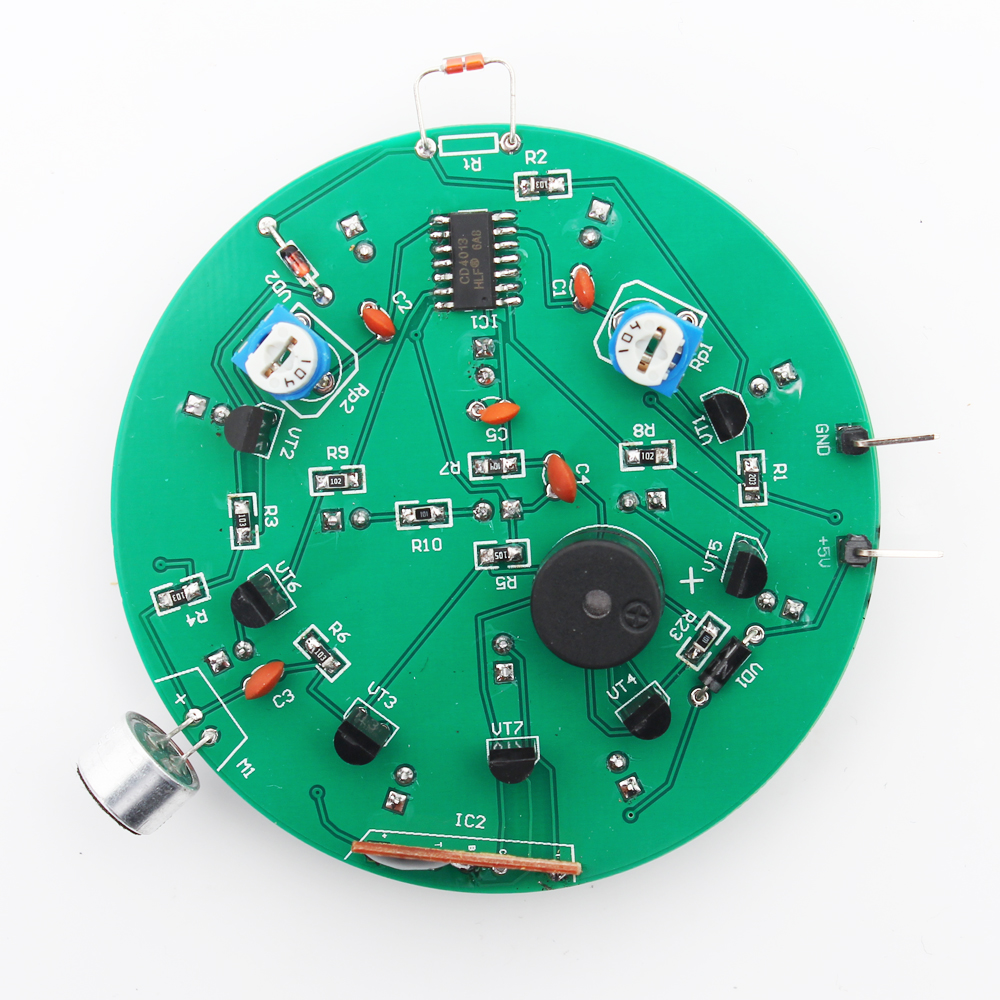
Step 5:Install 1pcs SOP-14 CD4013 at IC2.Pay attention to the installation direction, adjacent pins can not be shorted.
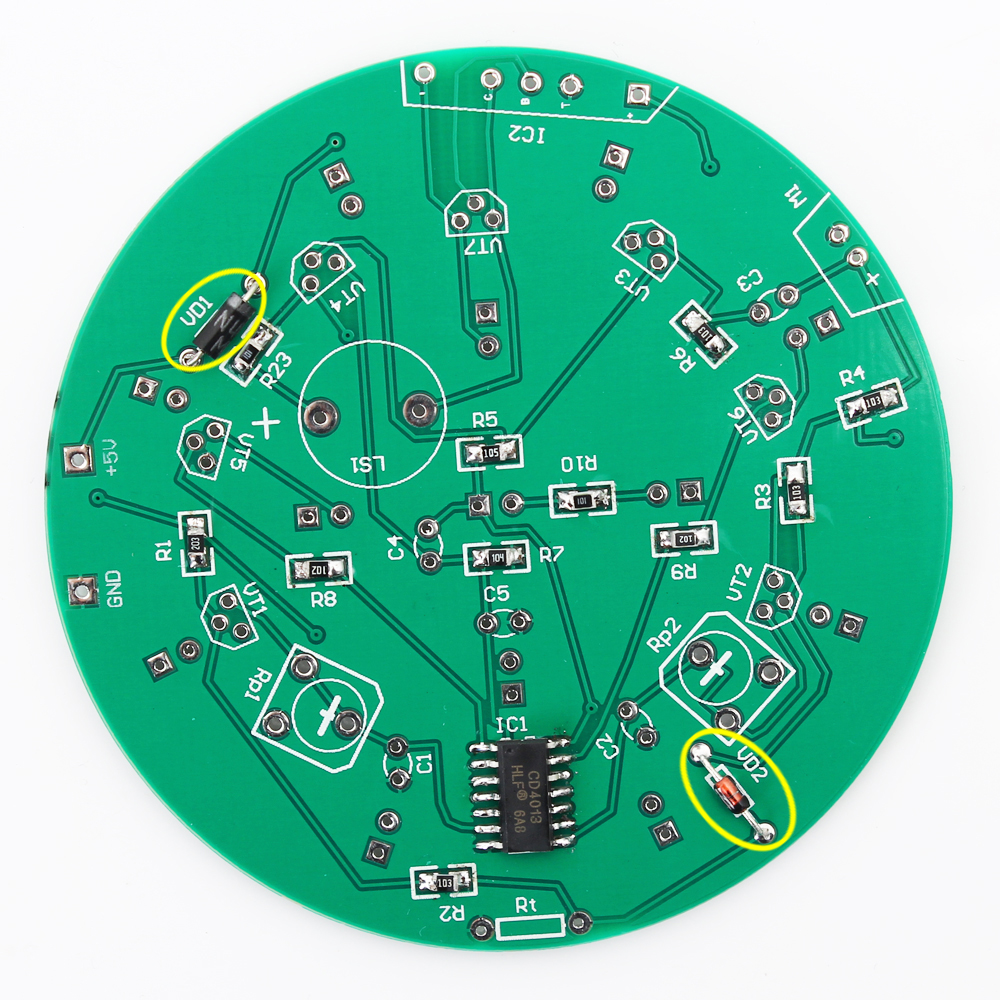
Step 6:Install 1pcs 1N4007 at VD1 and 1pcs 1N4148 at VD2.
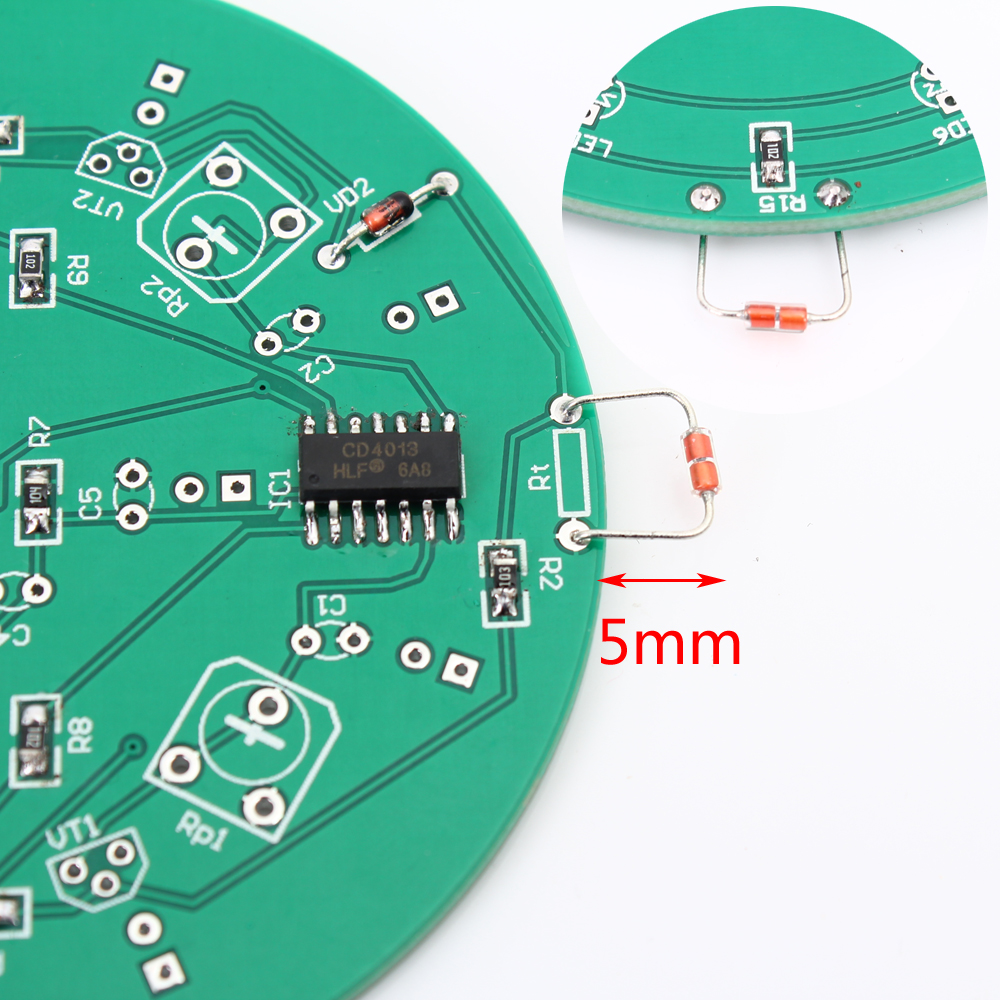
Step 7:Install 1pcs 10Kohm Thermistor at Rt.But pay attention to the installation method, the sensor can not be close to the PCB, and it needs to stretch about 5mm.
Step 8:Install 2pcs 103 ceramic capacitor at C1,C2.2pcs 104 ceramic capacitor at C3,C4.1pcs 102 ceramic capacitor at C5.
Step 9:Install 3pcs S9012 at VT1,VT2,VT4.3pcs S9013 at VT3,VT5,VT6.1pcs S8050 at VT7.
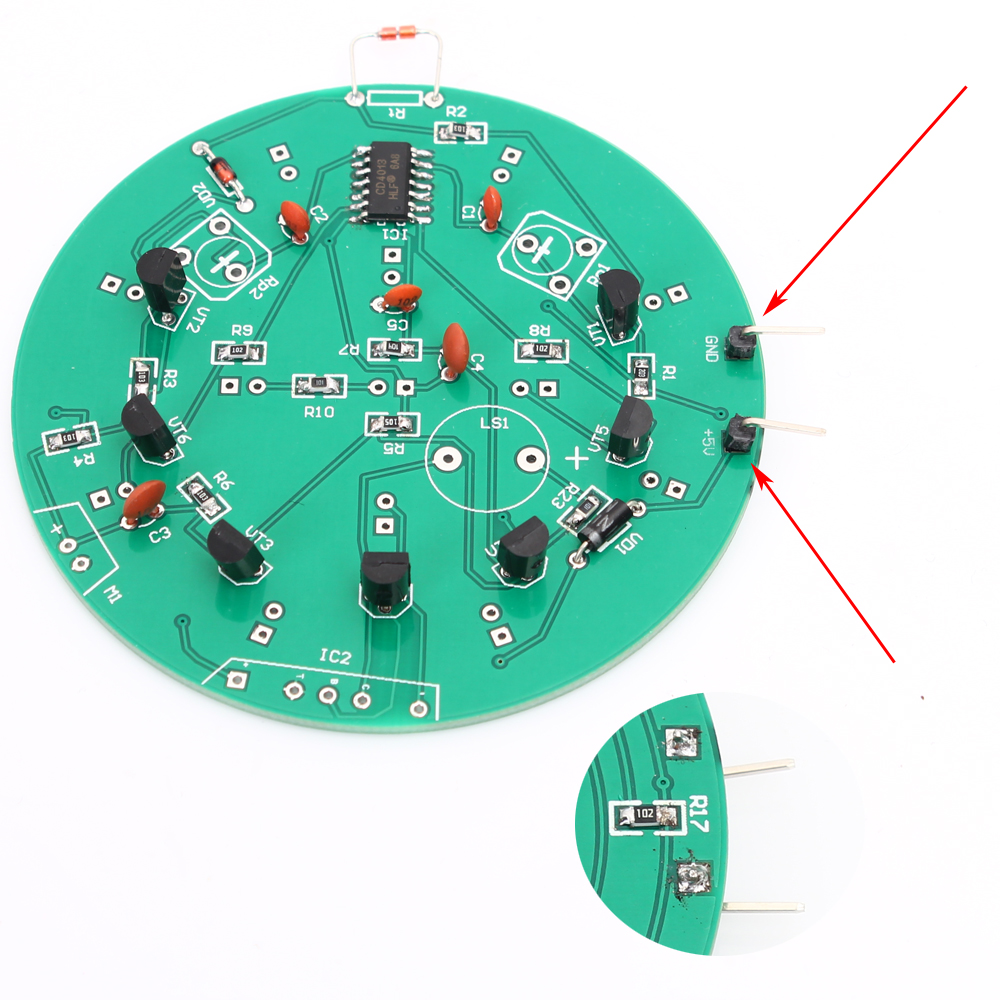
Step 10:Install Bending Male Pin at +5V and GND.
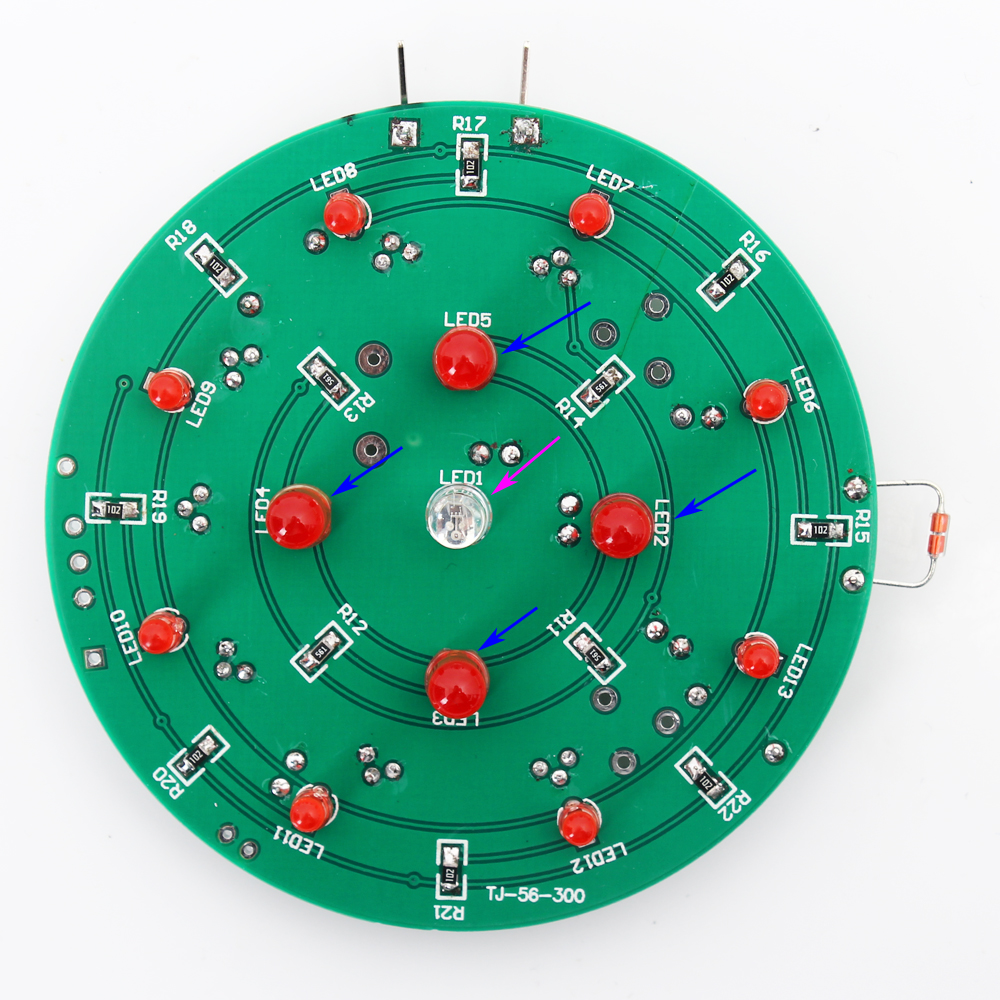
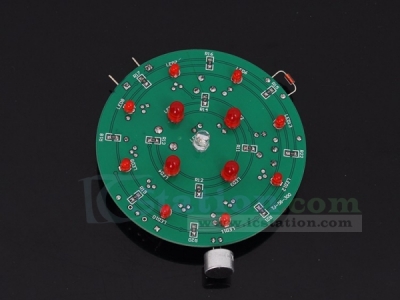
Step 11:Install 8pcs 3mm Red LED at LED6-LED13.
Step 12:Install 4pcs Red LED at LED2-LED5 and 1pcs RGB LED at LED1.
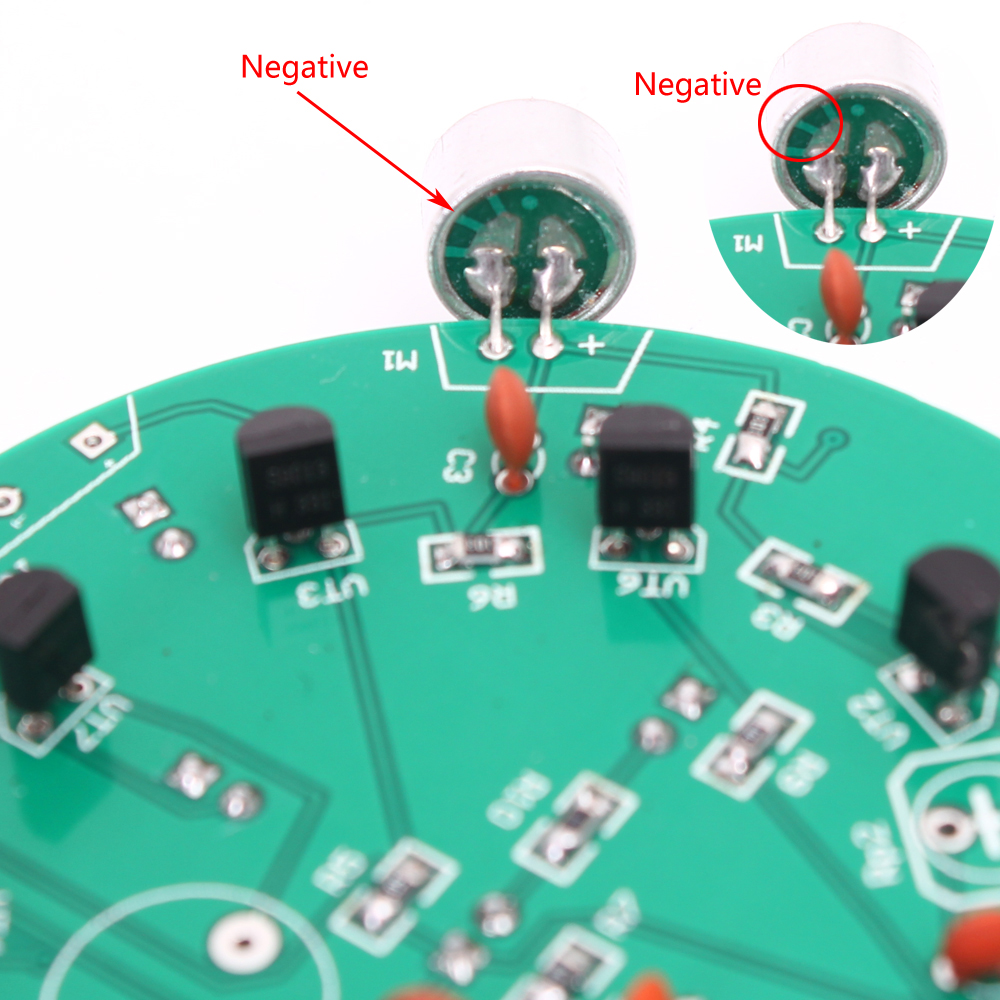
Step 13:Install 1pcs Microphone at M1.Pay attention to the installation direction.
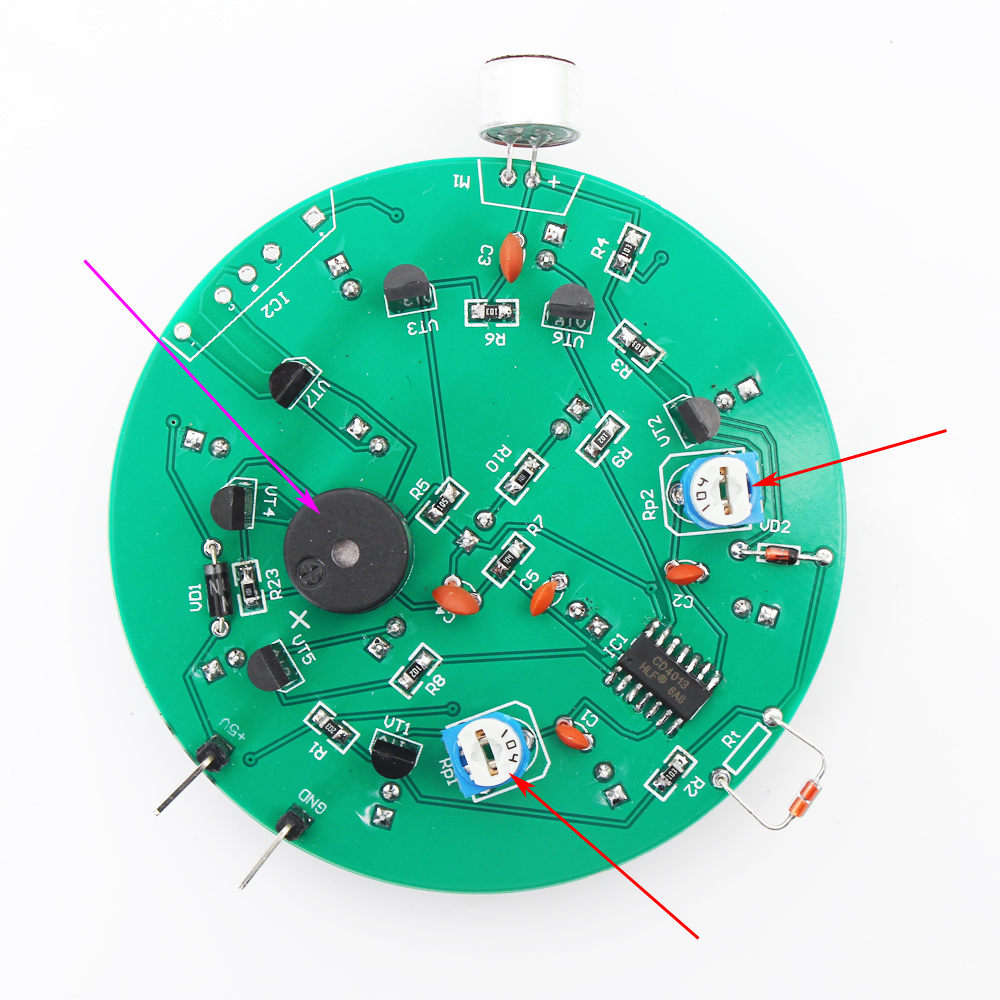
Step 14:Install 2pcs potentiometer at Rp1,Rp2.1pcs Passive Buzzer at LS1.
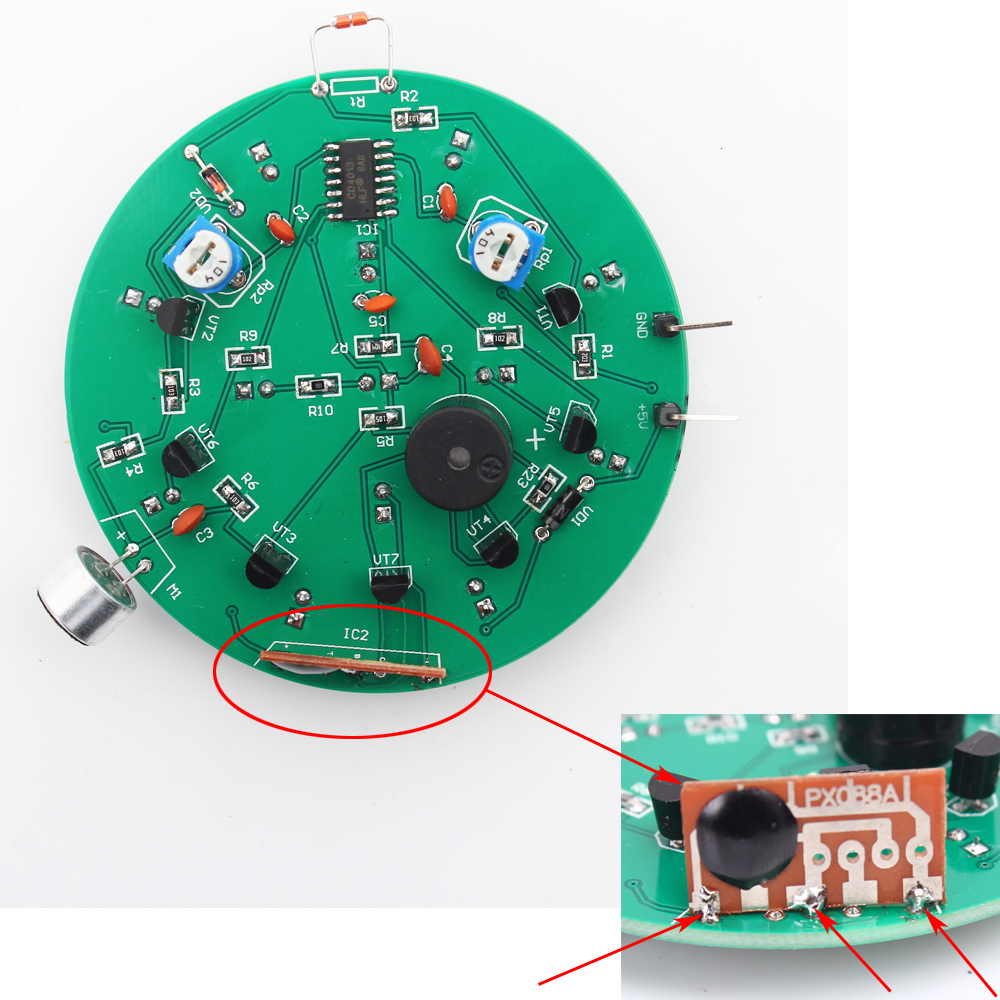
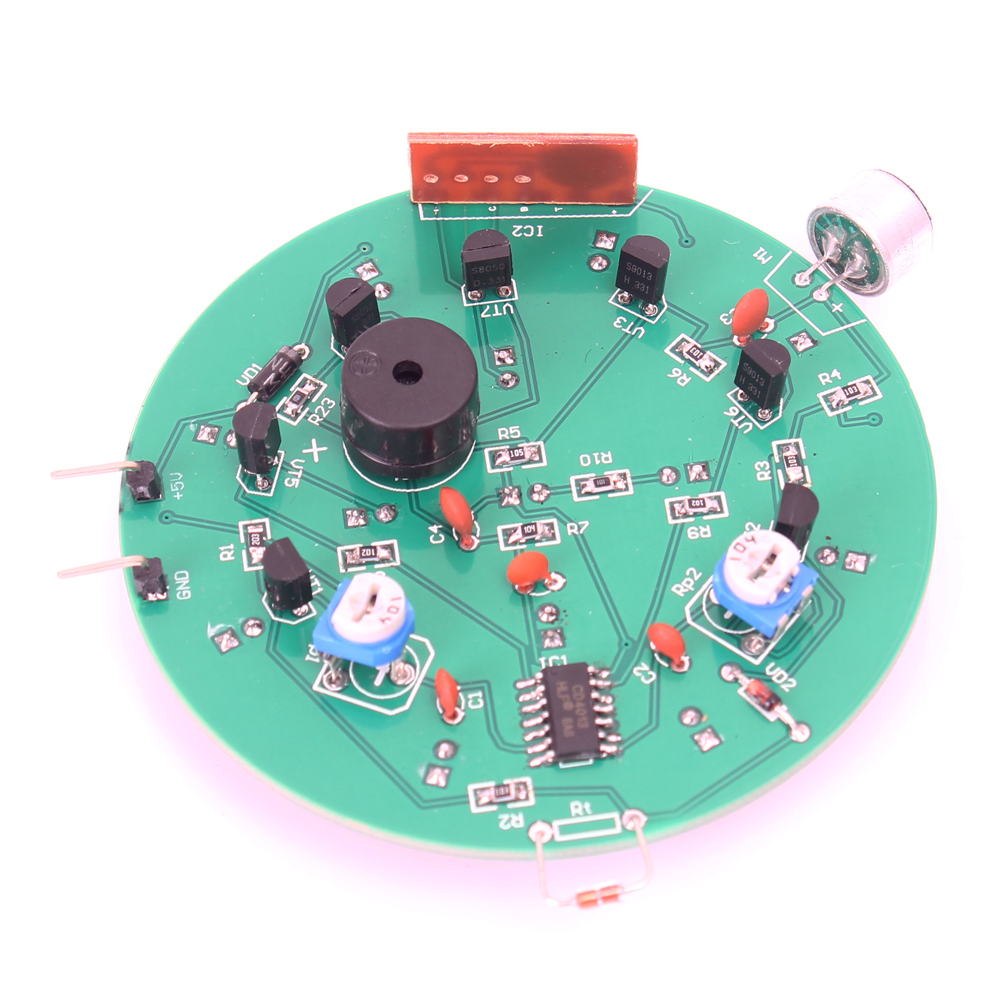
Step 15:Install 1pcs LX9300 Voice Chip at IC2.
Note:It just need to install Pin-1/Pin-3/Pin-5. Other pins do not need to be installed.
ICStation doesn't accept any form of pay on delivery. Items used to be shipped after payment. Below are the payment methods we can accept at the moment:
1) Paypal Payment
PayPal is a secure and trusted payment processing service that allows you to shop online. PayPal can be used at icstation.com to purchase items by Credit Card (Visa, MasterCard, Discover, and American Express), Debit Card , or E-check (i.e. using your regular Bank Account).
We are PayPal Verified
2) Bank Transfer / Wire Transfer / T/T
Bank Transfer / Wire Transfer / T/T payment methods are accepted for orders which the total price is up to US$300. The bank will charge about US$50 for the transfer fee if we do the payment in these ways. Feel free to contact us for bank payment details if you need pay via bank.
For other payment method, please contact us at orders@icstation-team.com for more details.


.png)