Your Shopping Cart Is Empty!
If you already have an account, Sign in.
If you already have an account, Sign in.


Parameters:
| No. | Parameter | Value |
| 1 | Name | Electronic hourglass |
| 2 | Model | EH-30 |
| 3 | Working Voltage | DC 3.3-5V |
| 4 | Shape Size | 74.4*43.7*24mm |
| 5 | Hourglass Speed | Adjustable |
| 6 | Packing Weight | 34g/kit |
| 7 | LED Color | Green |
Tools you need:
1>. Iron (30W)
2>. Solder wire
3>. Multimeter
4>. Tweezers
5>. Wire cutters
Precautions:
1>. Check part values & quantities against part list.
2>. Always meter resistors values before soldering.
3>. Understand all part polarities and orientations.
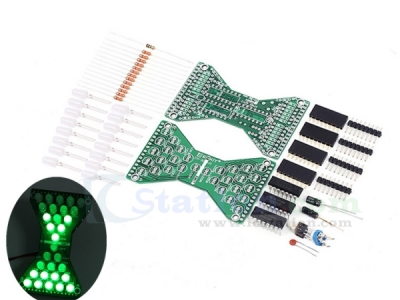
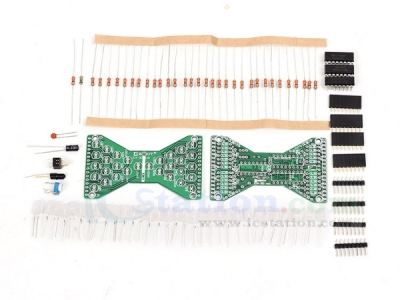
Component list:
| No. | Name | Parameter | QTY |
| R1-R30. R32. R33 | RES | 3.3K | 32 |
| R31 | RES | 1M | 1 |
| C2 | CAP | 222P | 1 |
| C1 | E-CAP | 22uF | 1 |
| LED-LED30 | LED | 5mm | 30 |
| U1 | IC | 4069 | 1 |
| U2. U3 | IC | 4015 | 2 |
| SW1 | Direction switch | SW300DA | 1 |
| S1 | Power switch | 6P Auto lock | 1 |
| VR1 | ADJ-RES | 100K | 1 |
| CN1-CN4 | Connector | 8P | 4 |
| CN5-CN8 | Connector | 8P | 4 |
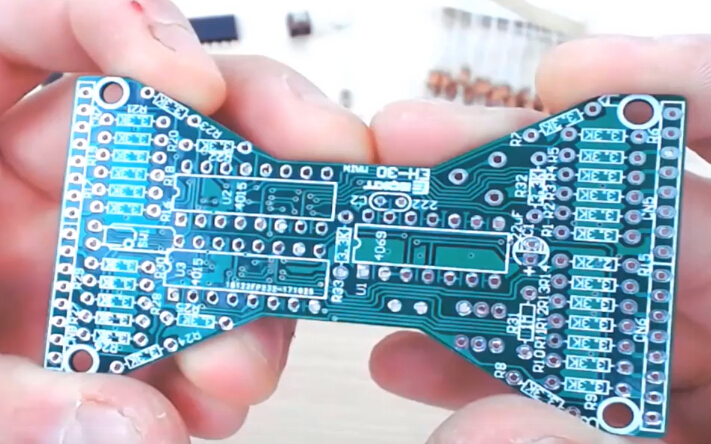
| / | PCB | EH-30-MAIN | 1 |
| / | PCB | EH-30-LED | 1 |
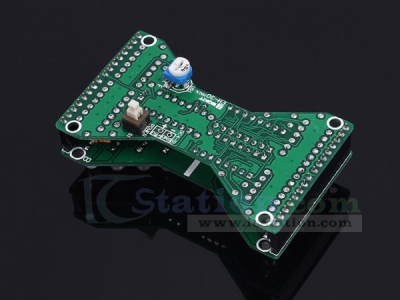
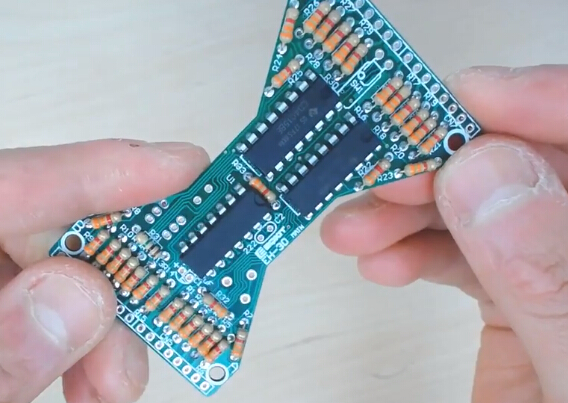
Installation steps:
1>. Install MIAN RES: R31=1 M ohms; Other resistors are 3.3K ohms

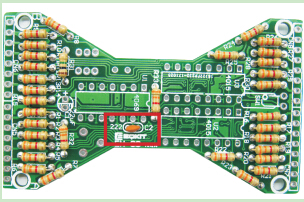
2>. Install CAP: C2=222P
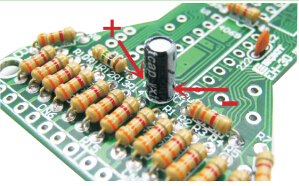
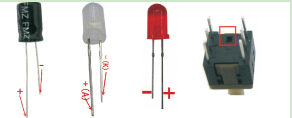
3>. Install E- CAP: C1=22uF, Notice that the positive electrode of electrolytic capacitor can not be reversed.
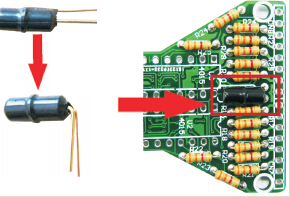
4>. Install Directional switch. Bend the switch 90 degrees, and then install it to SW1.
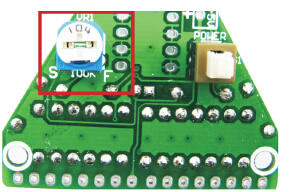
5>. Install ADJ-RES:
VR1=104K. Note that the adjustable resistance should be soldered to the back of the circuit board.
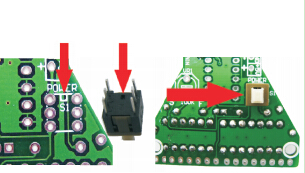
6>. Install power switch:
Pay attention to the installation direction installation direction of the switch.
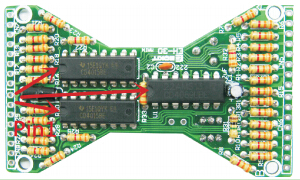
7>. Install IC:
Pay attention to the installation direction of the IC. U1=CD4069. U2=U3=CD4015.
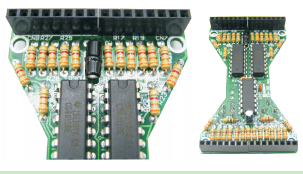
8>. Install 8pin Connector:
Refer to the picture below, install connector to CN5, CN6, CN7,CN8.
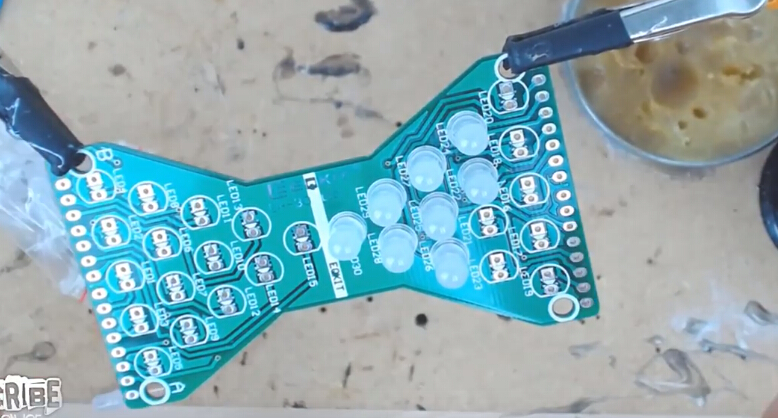
9>. Install LED panel:
Install 30 LED on the circuit board. The long foot is the positive pole. Install on the rectangle pad.
10>. Install pin connector:
Install the short side of the connector to the back of the circuit board.
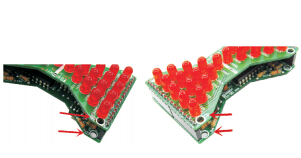
11>. Install main and LED:
Install the motherboard and LED gently press together A point to A, B point to B.
12>. Soldering power cable:
Red line is positive power supply DC5V suitable for USB. 3 section AA or AAA battery box.
Warm Tips:
Light- emitting diode and electrolytic capacitor the longer pin is it the anode it should be installed on the rectangle pad of PCB. Refer to the picture below:
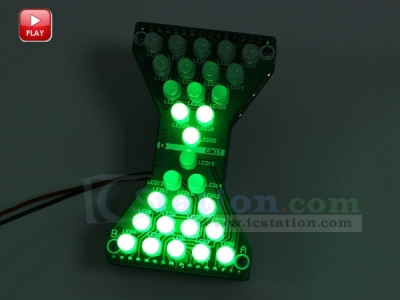
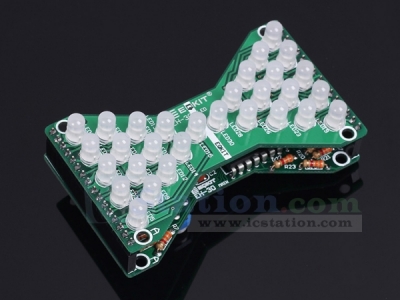
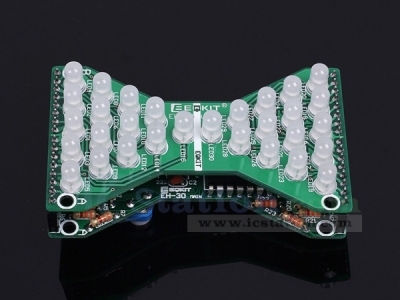
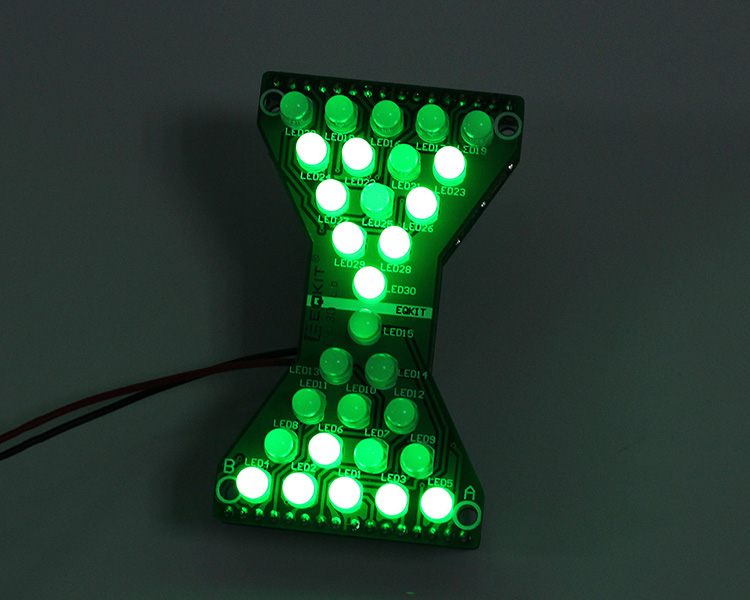
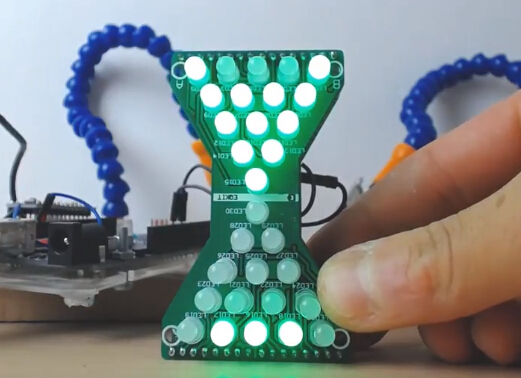
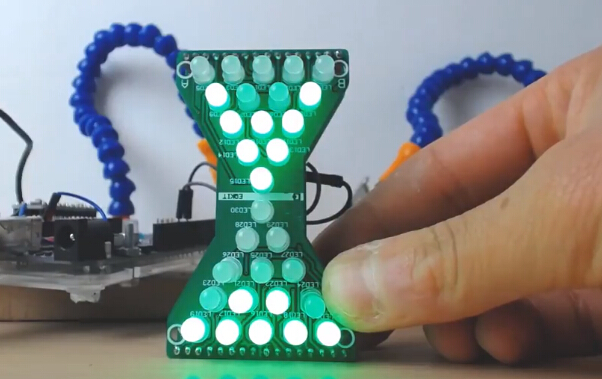
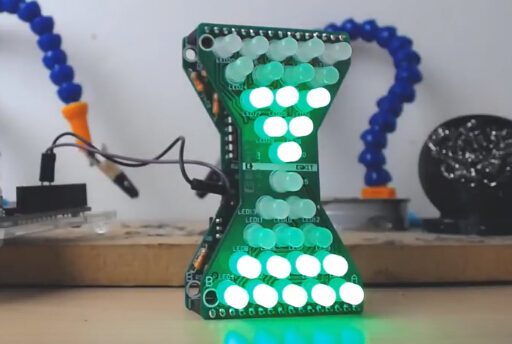
Finished Product Picture:
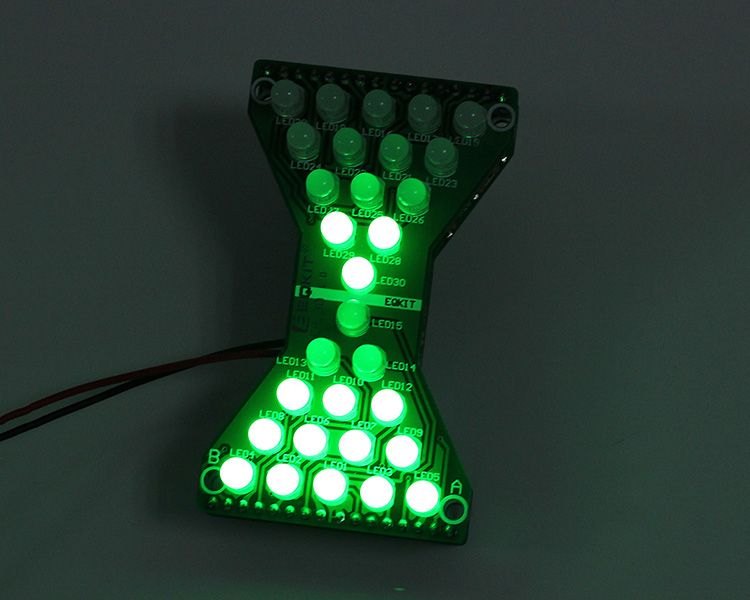
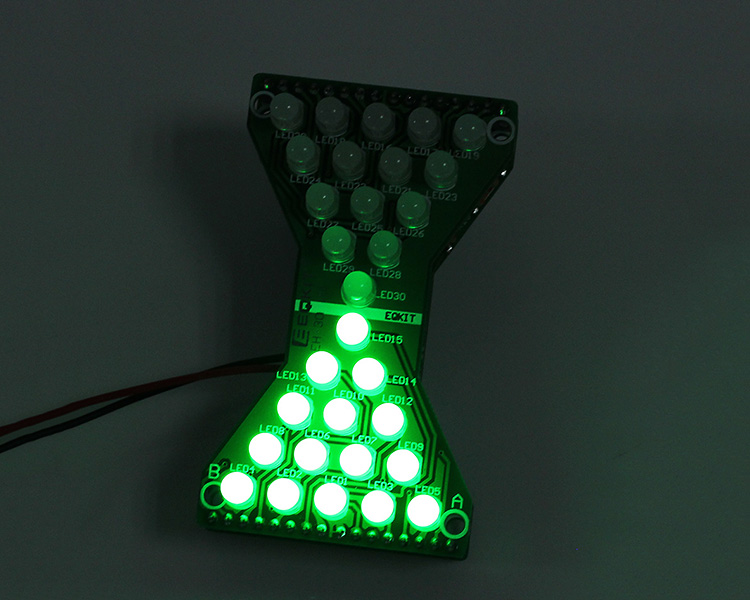
Tested by ICStation's Outstanding Partner MrJefferson105:
Learn More Details in the Video:
(The language in the video is English)
| Quantity | 10+ | 30+ | 50+ | 100+ |
| Price | $3.25 | $3.00 | $2.85 | $2.70 |
ICStation doesn't accept any form of pay on delivery. Items used to be shipped after payment. Below are the payment methods we can accept at the moment:
1) Paypal Payment
PayPal is a secure and trusted payment processing service that allows you to shop online. PayPal can be used at icstation.com to purchase items by Credit Card (Visa, MasterCard, Discover, and American Express), Debit Card , or E-check (i.e. using your regular Bank Account).

We are PayPal Verified 
2) Bank Transfer / Wire Transfer / T/T
Bank Transfer / Wire Transfer / T/T payment methods are accepted for orders which the total price is up to US$300. The bank will charge about US$50 for the transfer fee if we do the payment in these ways. Feel free to contact us for bank payment details if you need pay via bank.
For other payment method, please contact us at orders@icstation-team.com for more details.