1.Description:
YL3S-C1.1 is a 0-10KHz Frequency Pulse Counter. It can detect the number of input signal pulses and through calculations to control the different working states of the load.
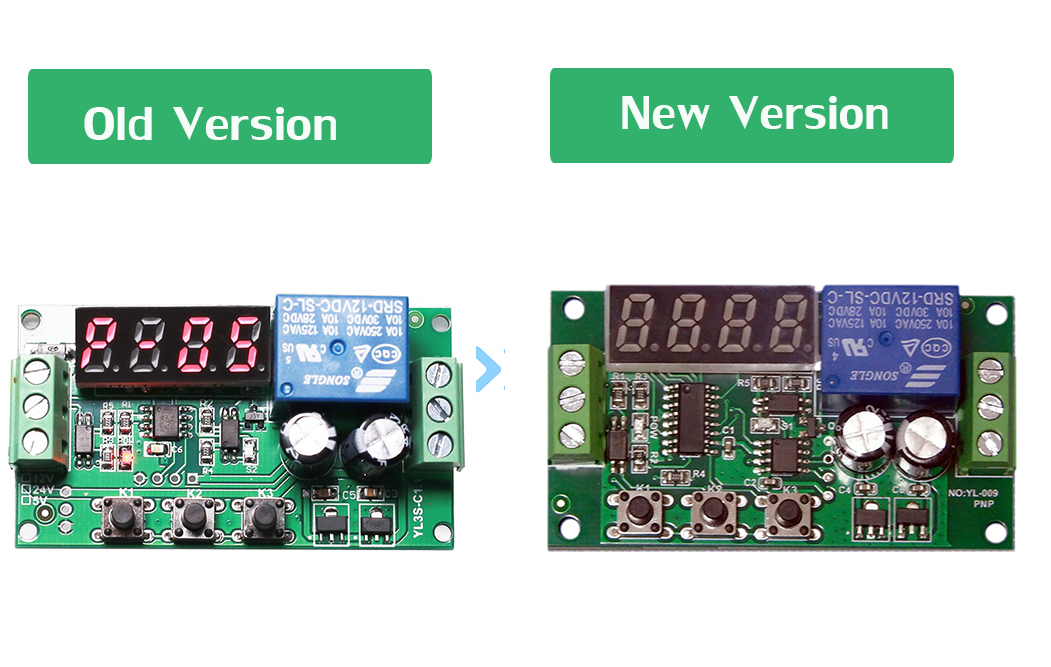
Note: this module has been slight changed now since 2024. Thanks for your understanding.
2.Features:
1>.Adjust 8 work modes
2>.Pulse signal trigger
3>.Support parameter memory function
4>.Relay switch output
5>.Power reverse connection protection
3.Parameters:
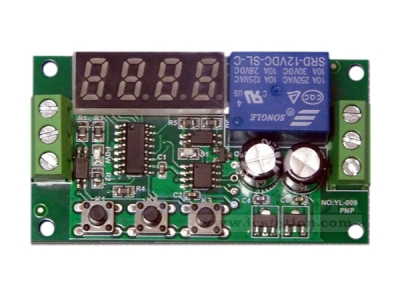
1>.Product Name:YL3S-C1.1 0-10KHz Frequency Pulse Counter Module
2>.Product Number:YL3S-C1.1
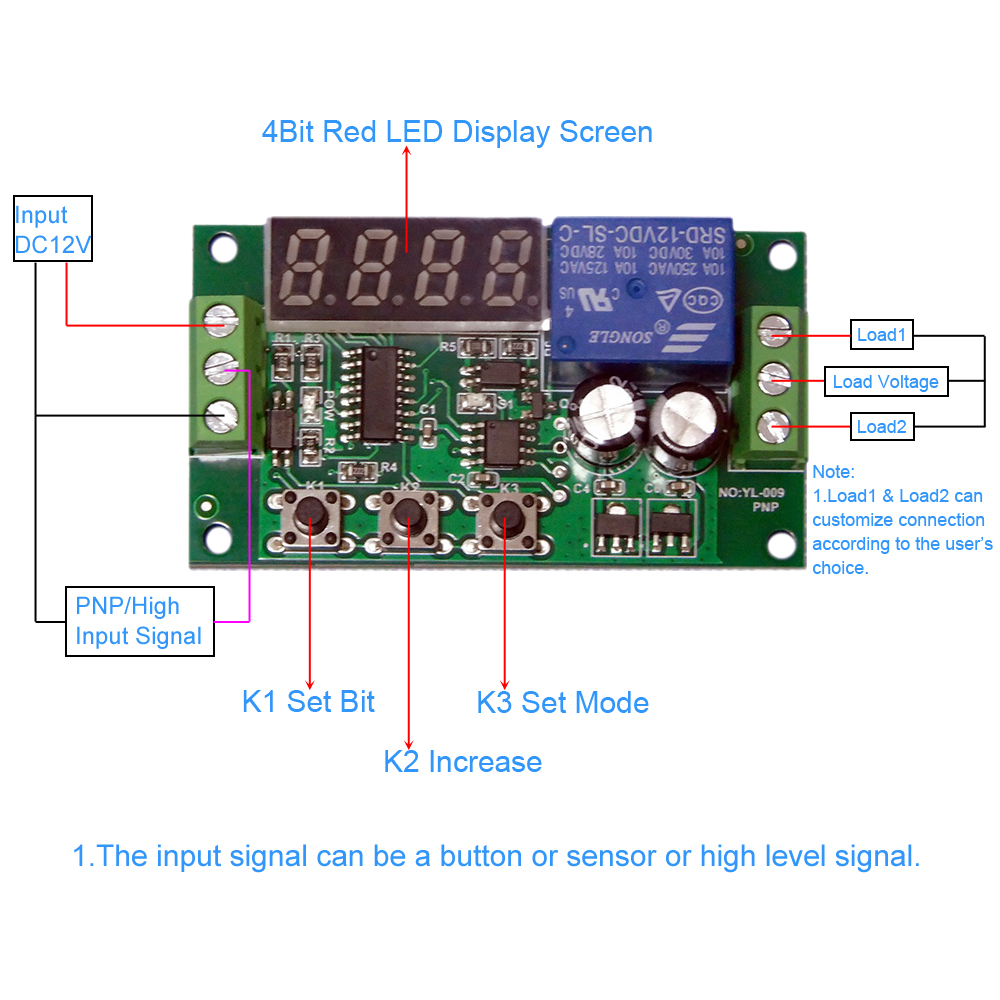
3>.Working Voltage: DC 12V
4>.Trigger Type:Button/PNP/High Level Control
5>.Output Type:Relay Switch Output(Not voltage output!)
6>.Load Voltage:AC250V 10A or DC30V 10A
7>.Display: 4Bit Red LED Display Screen
8>.Pulse Frequency:0-10KHz
9>.High Level Pulse:>5V
10>.Low Level Pulse:<1V
11>.Pulse Current:>25mA
12>.Working Temperature range:-20℃~85℃
13>.Working Humidity Range:5%-100%RH
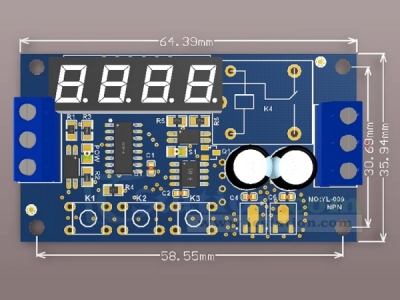
14>.Module Size:63*35*18mm
4.Set Parameter:
1>.Press K1 Button to set parameter value:
1.1>.Press K1 Button at the first time:The first bit will flashing.It is used to adjust the highest bit for the Parameter Value PV1.Then press K2/K3 button to set value for 0~9.
1.2>.Press K1 Button at the second time:The second bit will flashing.It is used to adjust the second bit for the Parameter Value PV1.Then press K2/K3 button to set value for 0~9.
1.3>.Press K1 Button at the third time:The third bit will flashing.It is used to adjust the third bit for the Parameter Value PV1.Then press K2/K3 button to set value for 0~9.
1.4>.Press K1 Button at the fourth time:The fourth bit will flashing.It is used to adjust the lowest bit for the Parameter Value PV1.Then press K2/K3 button to set value for 0~9.
1.5>.Press K1 Button at the fifth time:The first bit will flashing.It is used to adjust the highest bit for the Parameter Value PV2.Then press K2/K3 button to set value for 0~9.Some work mode does not need to set PV2.
1.6>.Press K1 Button at the sixth time:The second bit will flashing.It is used to adjust the second bit for the Parameter Value PV2.Then press K2/K3 button to set value for 0~9.Some work mode does not need to set PV2.
1.7>.Press K1 Button at the seventh time:The third bit will flashing.It is used to adjust the third bit for the Parameter Value PV2.Then press K2/K3 button to set value for 0~9.Some work mode does not need to set PV2.
1.8>.Press K1 Button at the eighth time:The fourth bit will flashing.It is used to adjust the lowest bit for the Parameter Value PV2.Then press K2/K3 button to set value for 0~9.Some work mode does not need to set PV2.
1.9>.Press K1 Button at the ninth time:The first bit will flashing.It is used to adjust the highest bit for the Parameter Value PV3.Then press K2/K3 button to set value for 0~9.Some work mode does not need to set PV3.
1.10>.Press K1 Button at the tenth time:The second bit will flashing.It is used to adjust the second bit for the Parameter Value PV3.Then press K2/K3 button to set value for 0~9.Some work mode does not need to set PV3.
1.11>.Press K1 Button at the eleventh time:The third bit will flashing.It is used to adjust the third bit for the Parameter Value PV3.Then press K2/K3 button to set value for 0~9.Some work mode does not need to set PV3.
1.12>.Press K1 Button at the twelfth time:The fourth bit will flashing.It is used to adjust the lowest bit for the Parameter Value PV3.Then press K2/K3 button to set value for 0~9.Some work mode does not need to set PV3.
1.13>.Press K1 Button at the thirteenth time to save parameters and display ‘0000’ and return to normal display status.
2>.Press K3 button to set work mode:
2.1>.P-01: Relay output turn ON if the number of pulses detected in 1 second is greater than the Set Parameter Value PV1. Otherwise relay turn OFF.
2.2>.P-02:Relay output turn OFF if the number of pulses detected in 1 second is greater than the Set Parameter Value PV1. Otherwise relay turn ON.
2.3>.P-03:Relay output turn ON if the number of pulses detected in 1 second between the Lower Limit Value PV1 and the Upper Limit Value PV2. Otherwise relay will keep OFF.
2.4>.P-04:Relay output turn OFF if the number of pulses detected in 1 second between the Lower Limit Value PV1 and the Upper Limit Value PV2. Otherwise relay will keep ON.
2.5>.P-05:Relay output turn ON if the number of pulses detected in 1 second is greater than the Upper Limit Value PV2. Relay output turn OFF if the number of pulses detected in 1 second is greater than the Lower Limit Value PV1.
2.6>.P-06:Relay output turn ON if the number of pulses detected in set time PV2 is greater than the Set Parameter Value PV1. Otherwise relay turn OFF.
2.7>.P-07:Relay output turn ON if the number of pulses detected is greater than the Set Parameter Value PV1. Then keep on for delay time PV3.Then relay turn OFF.
2.8>.P-08:Module start to detect pulse again if the number of pulses detected is greater than the Set Parameter Value PV1.Relay keep OFF if the number of pulses detected in set time PV3 is greater than the Set Parameter Value PV2. Otherwise relay turn ON.
5.Note:
1>.It is a relay switch output so it can not output voltage!
2>.It needs two voltage:work voltage and load voltage.
3>.Please read use manual and description before use.
6.Application:
1>.Delay switching
2>.Counter
3>.Access control system
4>.Water flow inspection
5>.Motor speed
6>.The electromagnetic valve
7>.Light strip
7.Package:
1pcs YL3S-C1.1 0-10KHz Frequency Pulse Counter Module