Categories
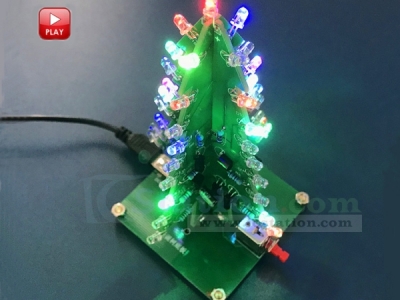
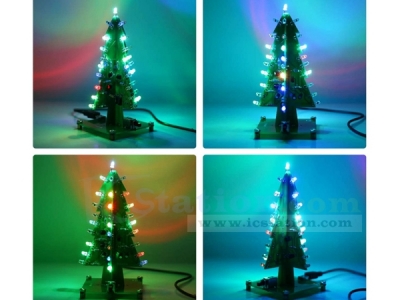
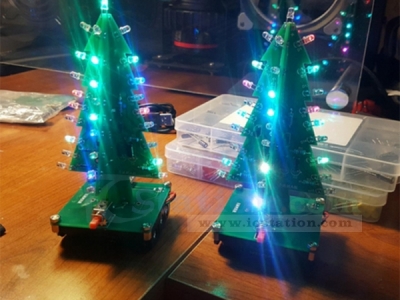
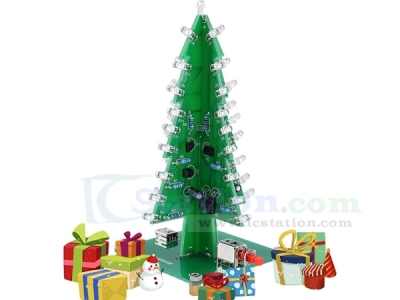
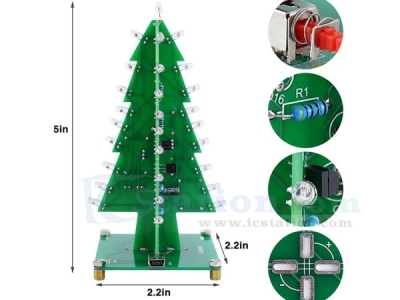
RGB LED Flash Christmas Tree DIY Kit
1.Introduction:
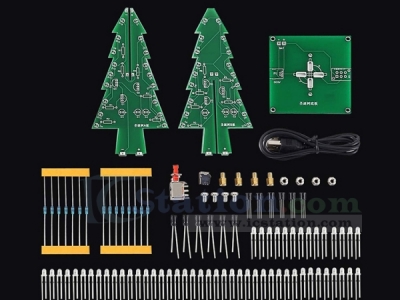
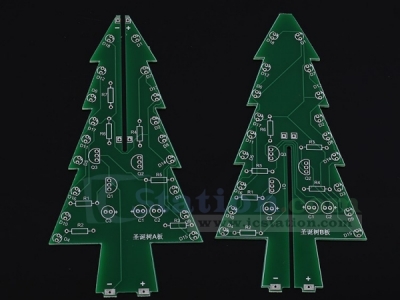
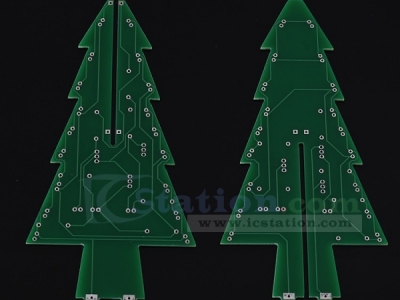
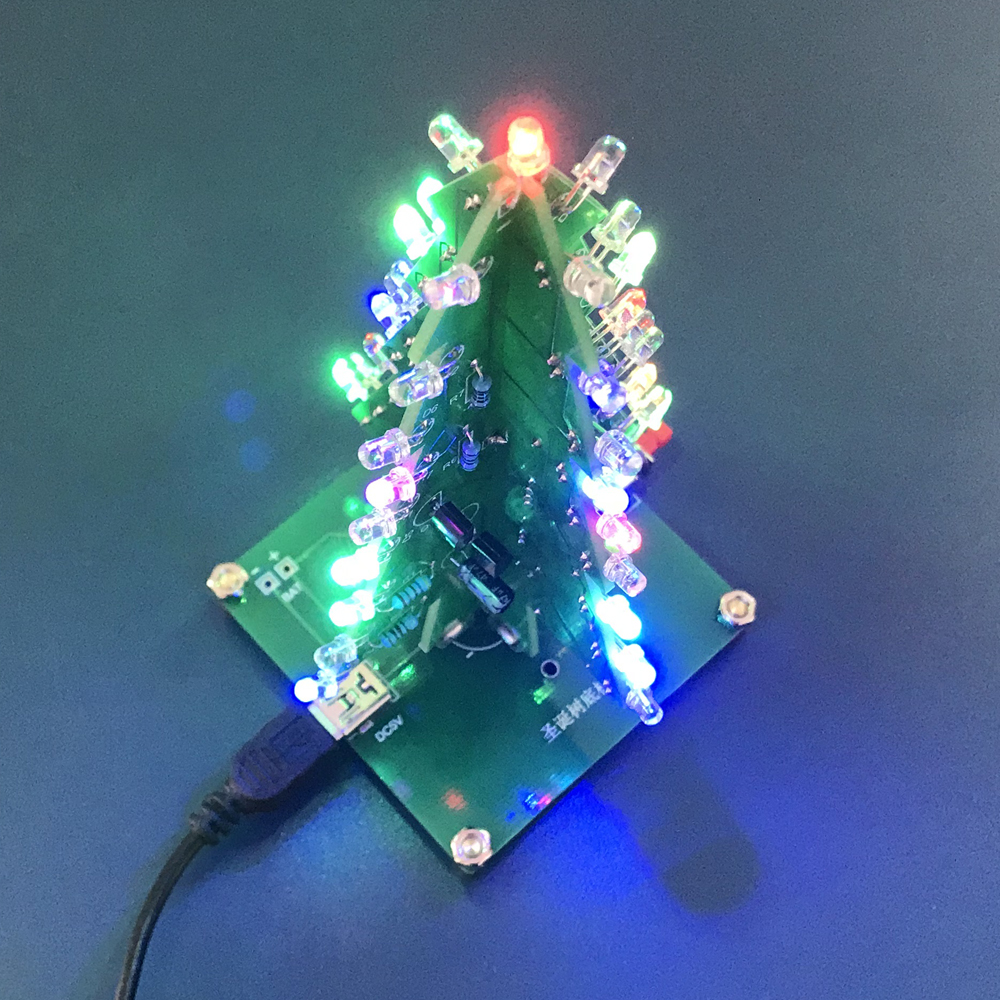
It is a flash Christmas tree kit consists of three circuit board, allows 36 LED flash alternately, showing a Christmas tree in the space of three-dimensional profile (the night environment has better viewing).
This DIY product needs to be soldered and assembled by yourself.
2.Parameter:
1>.Work Voltage:DC 4.5V-5.5V
2>.Work Current:60mA
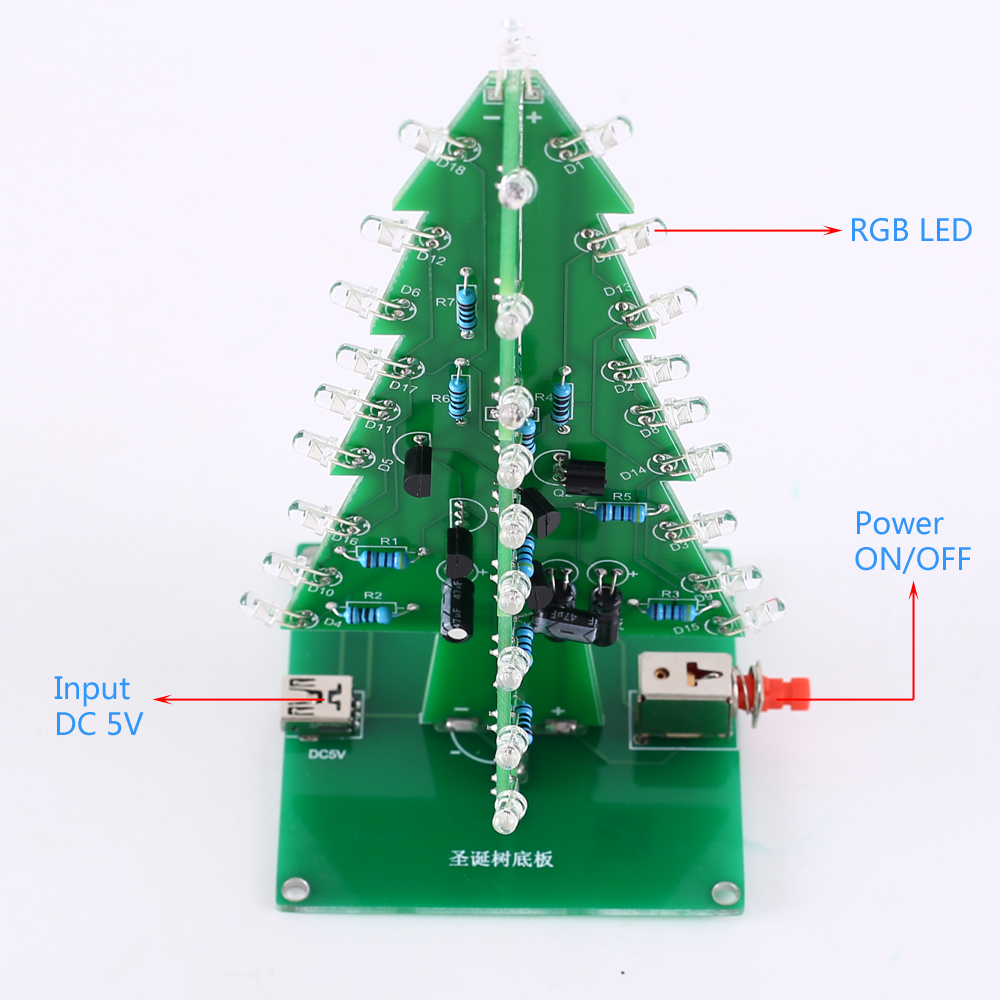
3>.Power Type:MINI USB
4>.Control Type:Button Control
5>.Color:RGB LED
6>.Work Temperature:-40℃~85℃
7>.Work Humidity:0%~95%RH
8>.Size(Installed):130*70*59mm
3.Function:
1>.RGB LED light color changes automatically
2>.Switch control
3>.MINI USB provide power supply
4>.Simple circuit
4.Installation Notes
1>.User needs to prepare the welding tool at first.
2>.This DIY installation is more difficult to be installed, please be patient until the installation is complete.
3>.The package is DIY kit.It need finish install by user.
4>.The soldering iron can't touch the components for a long time(1.0 second), otherwise it will damage the components.
5>.Pay attention to the positive and negative of the components.
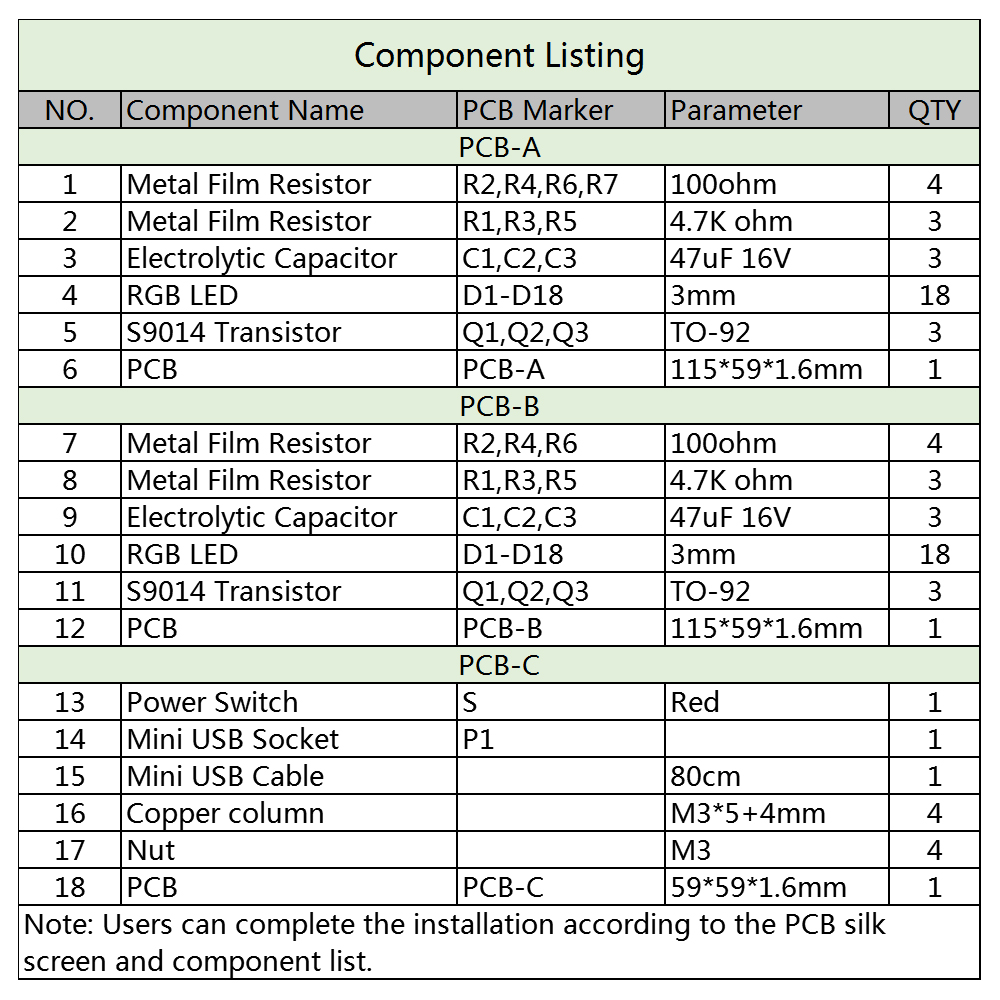
6>.Users can complete installation by PCB silk screen and component listing.
7>.User must install the LED according to the specified rules.Otherwise some LED will not light.
8>.Install complex components preferentially.
9>.Make sure all components are in right direction and right place.
10>.It is strongly recommended to read the installation manual before starting installation.
5.Installation Steps (Please be patient while starting the installation:)
Step 1: Install PCB-A. Install 4pcs 100ohm Metal Film Resistor on R2,R4,R6,R7.
Step 2: Install 3pcs 4.7K Metal Film Resistor on R1,R3,R5.
Step 3: Install 18pcs 3mm RGB LED at D1-D18.Pay attention to distinguish the positive and negative poles of LED and the Longer pin are positive pole. Control distance between PCB edge and LED head.
Step 4: Install 3pcs 47uF 16V Electrolytic Capacitor at C1,C2,C3.Pay attention to distinguish the positive and negative poles and the Longer pin are positive pole.A 2~3mm spacing is reserved between the capacitor and the PCB to facilitate bending of the capacitor for subsequent installation.
Step 5: Install 3pcs TO-92 S9014 Transistor at Q1,Q2,Q3.It is better to bend S9014's pin so that 2pcs PCB-A and PCB-B can better splicing.OK, PCB-A has been installed completed.
Step 6: Install PCB-B. Install 3pcs 100ohm Metal Film Resistor on R2,R4,R6.
Step 7: Install 3pcs 4.7K Metal Film Resistor on R1,R3,R5.
Step 8: Install 18pcs 3mm RGB LED at D1-D18.Pay attention to distinguish the positive and negative poles of LED and the Longer pin are positive pole. Control distance between PCB edge and LED head.
Step 9: Install 3pcs 47uF 16V Electrolytic Capacitor at C1,C2,C3.Pay attention to distinguish the positive and negative poles and the Longer pin are positive pole.A 2~3mm spacing is reserved between the capacitor and the PCB to facilitate bending of the capacitor for subsequent installation.
Step 10: Install 3pcs TO-92 S9014 Transistor at Q1,Q2,Q3. It is better to bend S9014's pin so that 2pcs PCB-A and PCB-B can better splicing.OK, PCB-B has been installed completed.
Step 11: Test.Connect 4.5V-5V to PCB-A and PCB-B separately.Preliminary welding success if LED are blinking automatically.
Step 12: Align the two positioning heads on PCB-A and PCB-B and then fixed with tin.
Step 13: Install Mini USB Socket at P1.
Step 14: Install 1pcs power switch at S.
Step 15: Fixed PCB-A and PCB-B on PCB-C.Align the two positioning heads and then fixed with tin.
Step 16: Install the top LED.Note the positive and negative of LED.At this point, the installation is complete!!
Step 17: Mounting Copper column and nut as bracket.
Step 18: Turn on the power and enjoy the effect.
If you need the documents in pdf version, pls contact orders@icstation.com.
Quantity | 5+ | 10+ | 30+ |
Price | $5.75 | $5.50 | $5.00 |
First we should say that ICStation doesn't accept any form of pay on delivery.Items used to be shipped after receiving the order info and payment. Below are the payment methods we can accept at the moment:
1) Paypal Payment
PayPal is a secure and trusted payment processing service that allows you to shop online. PayPal can be used at icstation.com to purchase items by Credit Card (Visa, MasterCard, Discover, and American Express), Debit Card , or E-check (i.e. using your regular Bank Account).
We are PayPal Verified
2) Bank Transfer / Wire Transfer / T/T
Bank Transfer / Wire Transfer / T/T payment methods are accepted for orders which the total price is up to US$500. The bank will charge about US$50 for the transfer fee if we do the payment in these ways. Feel free to contact us for bank payment details if you need pay via bank.
For other payment method, please contact us at orders@icstation-team.com for more details.